Showing posts with label clothing. Show all posts

Monday, September 9, 2013

Skirt-A-Day Sewing: Book Review and Giveaway!


Happy September, everyone!

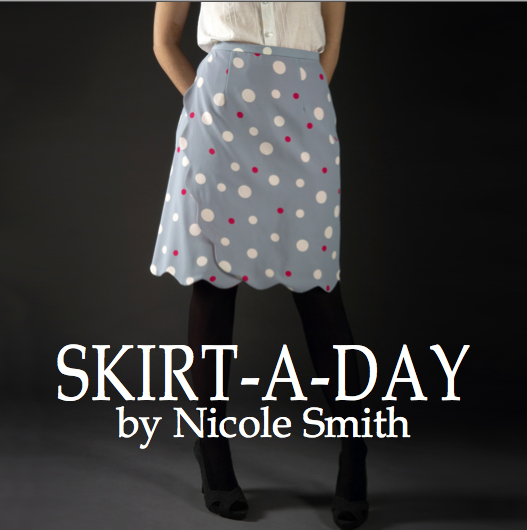
I'm so excited to share another new book with you all: Skirt-a-Day Sewing: Create 28 Skirts for a Unique Look Every Day

If you've read my blog at all, you know I aspire to sew more clothes for myself.  I've attempted store-bought patterns but am always stuck when it comes to sizing - my curves don't fit exactly what's on the package!  Enter: Skirt-a-Day Sewing

This book walks you through the steps of creating your own customized sloper (a pattern made exactly to YOUR measurements).  From that sloper, the book shows you how to springboard and create 28 different skirts, based on four basic styles: wrap, straight, flare and high-waisted.  Each project is rated beginner, intermediate or advanced.


To start, I went with the author's advice and sewed a wrap skirt.  It was hard to choose because all the skirts are so cute! 

Creating a sloper, and the subsequent patterns takes time.  These are not one-hour projects.  But, the time put in is well worth it as you'll create a skirt that fits you EXACTLY how you want it! 

I treated myself to a new tool suggested by the author: the Dritz Styling Design Ruler
It helps draw curves (which I definitely have!) and other pattern needs.

Because it's getting cool here in New England, I wanted to use a fabric that would transition into fall - a light-weight corduroy felt right.  Works with wedges for now, tights and boots later.  My goal was to use leather trim for the ties and pocket.


A work in progress here.  I ended up cutting the ties too short (so they don't actually wrap!) and I decided to forego the pocket.  But...can you see the fit?  Pretty spot on for my curves. 

I'm looking forward to trying more skirts (27 to go!) and working more with my sloper.  For never having done sewing like this, Skirt-a-Day Sewing is a great resource for construction, drafting, designing and sewing. 

Would you like to try your hand at it? 

Thanks to the lovely Storey Publishing, I have a copy of Skirt-a-Day Sewing to give away!

Leave a comment about which style you would try first.  Giveaway is open until Monday, September 16th at 11 p.m. EST.  Open to U.S. residents only. 

And, if you just can't wait for the giveaway, you can find a copy HERE !

Good luck!

And, for more chances to win, check out these amazing blogs:

9/10 http://www.sewingrabbit.com/


Friday, May 4, 2012

Up, up and away!


We had friends over the other day and one of the boys was dismayed to not have any dress-up clothes (apart from all the dresses!).  Remembering Jill's post about a set she made for a friend, we sprung into action to remedy our dress-up stash void.

Apart from some slippery fabric that wanted to pucker, I think our superhero friend will love it - I can already imagine him flying around his yard, deflecting his older brother's lasers.

Now, can I get away with making and wearing one of my own?  Some days, I just need it! 

Wishing you a superhero kind of day!


Wednesday, April 11, 2012

Whaddya know?

I just got an email telling me one of my spring tops is a finalist this week!  Amazing - especially when you see the other tops and the people behind them!  I'm a little in awe to be included (but very, very happy!).


Check them out HERE.  (I'm the last one, letter L.) 

Wishing you some good news today!

Wednesday, April 4, 2012

Sunny sailing days spring top


Here is my second spring top for Rae's sew along. 


It is entirely inspired by a Tracy Reese shirt I saw featured in Real Simple.  I couldn't find black and white striped fabric, so I used this mustardy yellow stripe from Joann instead.  It is a polyester spandex knit.  Just a little fancier than cotton knit, there is a slight shimmer to the fabric.


While I didn't have expert photographer hubby helping with photos this time, I did have an apprentice take this shot for me.  Not bad for a five year old whose fingers barely reached the shutter release!


Friday, March 30, 2012

Color block spring top


Okay, I've put aside my sewing-for-me hang ups and made a shirt for Rae's Spring Top Sewalong.


I drafted the pattern myself and used these great rayon/spandex knits.  The black one is from the April Johnson for Project Runway line at Joann's.  Do I feel facier that I was sewing with PR fabric?  Yup!


I get bored with the plain t-shirt and jeans option, but never feel like I find interesting shirts in my price range.  This color block option feels just interesting enough (without the "what were you thinking?" piece).


And, if you were wondering what the back looks like (or what I would look like being frisked), here it is!

Look for me in the Spring Top Photo Pool!

Wishing you the courage to tackle a new project!


Sunday, September 18, 2011

A monkey applique shirt, some news and a chalkboard mat tutorial...

First off, look who's two!


I can't believe how grown up she looks in this photo! The shirt is mommy-made, based on the monkey fabric in her party favors - Urban Zoologie Monkeys by Ann Kelle. 


Second, some quick news: I have a line of reusable snack sacks currently for sale at a local farm stand.  The pairing of the snack sacks and a business promoting local produce feels like such a good fit.  If you are a leaf-peeper in Western Mass, be sure to swing by M&M Green Valley Produce to check them out!

Last, but not least, I gave you a sneak peek at some chalkboard fabric a while back.  Now, that fabric has magically transformed into chalkboard mats!  These roll up for easy travel, and are perfect for entertaining little ones at restuarants, in the car, etc.

Interested in making one?  Here's how:  

 Materials: one 13.5 " x 11"  piece of cotton quiliting fabric
                 one 4" x 4" piece of cotton quilting fabric
                 one 13.5" x 11" piece of chalkboard fabric
                 one package extra wide, double fold bias tape, 1/2" width
                 12" piece rickrack (or ribbon) for tie


 1.  Round corners of both fabric pieces.


2. Pink top and left edge of 4 inch square.  Align with bottom right corner of chalkboard fabric and baste.  Trim along rounded corner.


3.  Use a spray adhesive to baste the wrong sides of fabric together.  My spray adhesive of choice?  Sulky KK 2000 - non-toxic, non-flammable and safe for the environment!


4. Beginning in the middle of the bottom, sandwich chalkboard fabric and cotton fabric between bias tape.  Note: the photos show me sewing with the chalkboard side up, but it's better to sew with the cotton side up.  This way, you can make sure you encase all the cotton fabric.


 5. Once you have sewn the bias tape around the entire chalkboard mat, overlap the ends by about an inch and a half.  Cut the tape.


 6. Open the tape and fold the end, wrong sides togther, about a half inch.


7.  Fold the sides of the tape back, enclosing the raw edges.  Now, re-sandwich the mat in the fold of the tape, sew and backstitch. 


8.  Fold your piece of rickrack or ribbon in half and sew to the right edge, half way up, on the cotton side.  Note: I used Fray Check on the ends of my rickrack.


9.  Write a message to your little one, tuck the chalk in the pocket, roll and tie your mat, and off you go!


Here are the ones I made for the party - perfect for a two year old girl and her friends!


And, for the two babies who came, their very own monkey bibs (because they'd probably just eat the chalk!). 


Wishing you lots of reasons to monkey around today!


Thursday, August 4, 2011

And, I'm done...

...with the doll clothes, that is. 

This last batch all come from this book.  Very good, easy to follow patterns. 

I still can't get over how detailed doll clothes can be.  I think I could now create an entire wardrobe for MYSELF after this experience. 

But, it was all good fun and a great project.

First off was this little fleece vest with fleece trim and a separating zipper (pay no attention to some extra stitching on one side of the collar!).
Fleece vest

Collar detail
 Next, some khaki pants to go with the vest.  Two issues here: first, there are supposed to be cargo pockets on the pants, but my brain wasn't processing the directions for making the box pleat (or the measurements were wrong in the book) so I put those aside.  Second, these patterns don't call for much finishing of seams.  After sewing up the pants, I decided to serge the inside - hacking off part of the fly.  So, it looks a little lopsided because it's missing about a 1/2" of fabric.

Khaki pants with REAL fly...

...and REAL pockets!
Lastly, the tweed overcoat for chilly New England winters.  I originally wanted something in an animal print, but this fabric jumped out at me.  I really love the red piping with it.

More REAL pockets!

Tweed overcoat

Sleeve detail - see the slight gathering?

Lined, no less!

Back view -  I love the piping accent

All assembled..

...packed, and ready to go!
I hope Chloe enjoys her new clothes (and fits into them!).  I think I'll take a break from sewing small things and get going on some birthday things for an almost-two-year-old in our house. 

Wishing you the satisfaction that comes from a completed project!

LinkWithin

Related Posts Plugin for WordPress, Blogger...