

Last week, I introduced the Bias Tape Tuesdays series. In this series, I will feature a different tutorial each week that uses bias tape in various ways. (For a great discussion about bias tape, see here.)
You could easily just go to the fabric store and buy the prepackaged bias tape, but it is made out of a polyester fabric. For my taste, if I am using good cotton fabrics for a project, I don't want to use a lesser-quality fabric for the finising. And, you are stuck using the colors available - and no cute prints! To remedy that, I offer the Bias Tape Made Easy Tutorial (with a sneaky trick to make it great every time).

To get us started, we need to learn how to fearlessly make yards and yards of gorgeous bias tape.
In this tutorial, I show you how to use a half yard of fabric (to yield 17 yards of bias tape!) but any size rectangle would work.
1. Fold fabric with selvages together.

2. Cut off selvages.

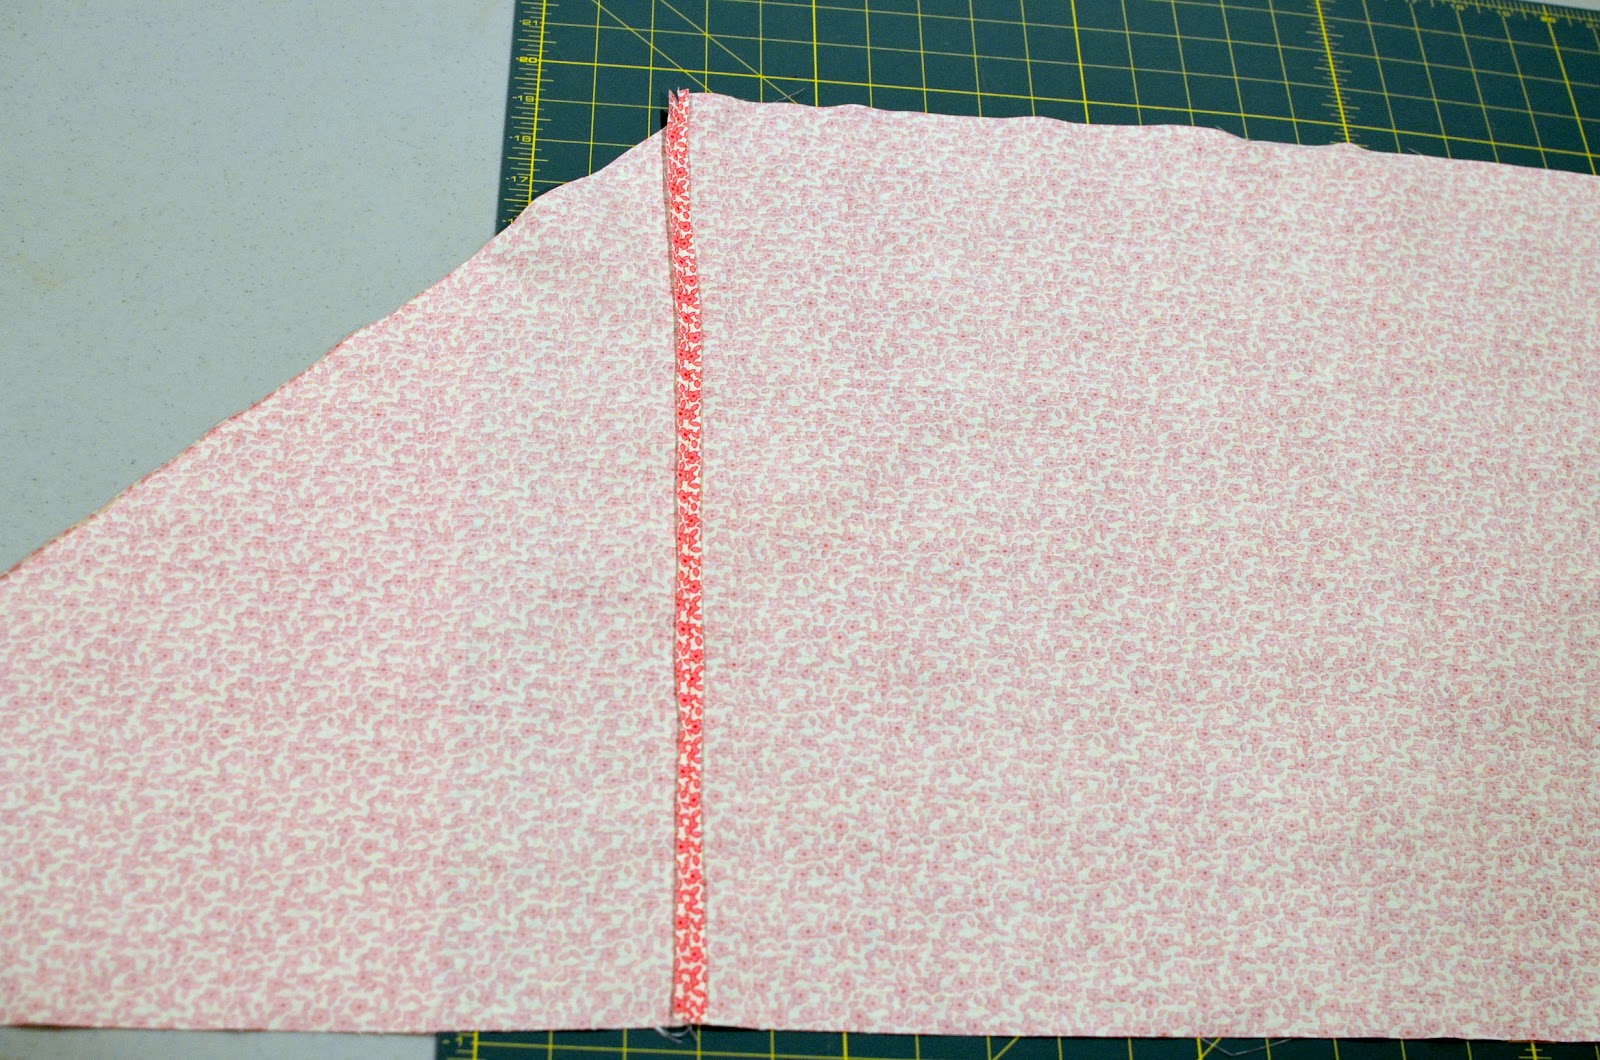
3. Fold up one corner of fabric at a right angle. Press.

4. Cut along the pressed line.


5. Without turning or flipping the cut triangle, move it from the right side of the fabric to the left. Line it up with the left edge of the fabric.


6. Pin the triangle and left side of fabric, right sides together.

7. Sew this seam with a 1/4" seam allowance and press open. You will now have a parallelogram of fabric (you know - a tilty rectangle).
8. Starting on the right side (where you folded, pressed and cut the triangle), line up your ruler along the cut edge. Measure whatever width you need for your bias. In this case, I am making 1/4" double fold bias tape, so I measure 1 1/4".


9. Continue to measure this width across the fabric, staying parallel to the cut 45 degree edge on the right.

10. Continue lines over seam from step 7.

11. Sneaky trick: when you are done marking these lines, mark a line 1/4" down from top edge of parallelogram. Repeat for bottom edge.

12. Now, you are going to take the long edges of the parallelogram (where you just marked the 1/4" line) and put them right sides together. As you work, the fabric will start to twist a little - THAT'S A GOOD THING!

13. To start, you want one edge of the fabric to overlap the other by one measured width from step 8. You are going to pin right where the measured width line and the marked 1/4" line cross.

14. As you pin through the fabric, it should look like this from the front (see how the pin goes through the intersection of those two lines?)..

...and this from the back. If you have them lined up correctly, the pin should go through that same intersection point on the back of the fabric. If not, take the pin out, shift the fabric and redo. As your fabric is cut on the bias, it should have a little more stretch to it, which can be helpful at this point. TAKE THE TIME TO LINE UP THESE POINTS - IT WILL MAKE THE NEXT STEPS COME OUT MUCH BETTER!

15. Here is the fabric all pinned - a twisted tube - but that's how it's supposed to look! No worries!

16. Sew along the pinned edge, right at your 1/4" marked line. Twist fabric to lay flat as you sew.

17. Press the seam open. I find it helps to use a Dritz Collapsible Sleeve Board . It's like a mini-ironing board, and makes it much easier to slide the fabric over.

18. Once the seam is pressed, you are ready to cut your strip! Start where the fabric overlaps.
I find it helpful to keep the tube on the sleeve board so that I don't accidentally cut into the tube somewhere else! Keep cutting and turning fabric. When you get to a sewn seam, just cut right over and follow your measured width line.

After a LOT of cutting, you will end up with a pile of bias strip!

19. To turn it into bias tape, pull out your bias tape maker - that little triangle with a handle. Insert one end of the fabric into the wide end, and push through. You can use a pin or other pointy object to stick through that little slot and help feed it through until it pops out the skinny end.

20. Once you have an end out, pin to one end of your ironing board. Set your iron for whatever fabric you are using.

21. Starting at the pinned end, run the iron over the bias strip, pulling the bias tape maker with the other hand (the little handle meant to be pulled at this point).
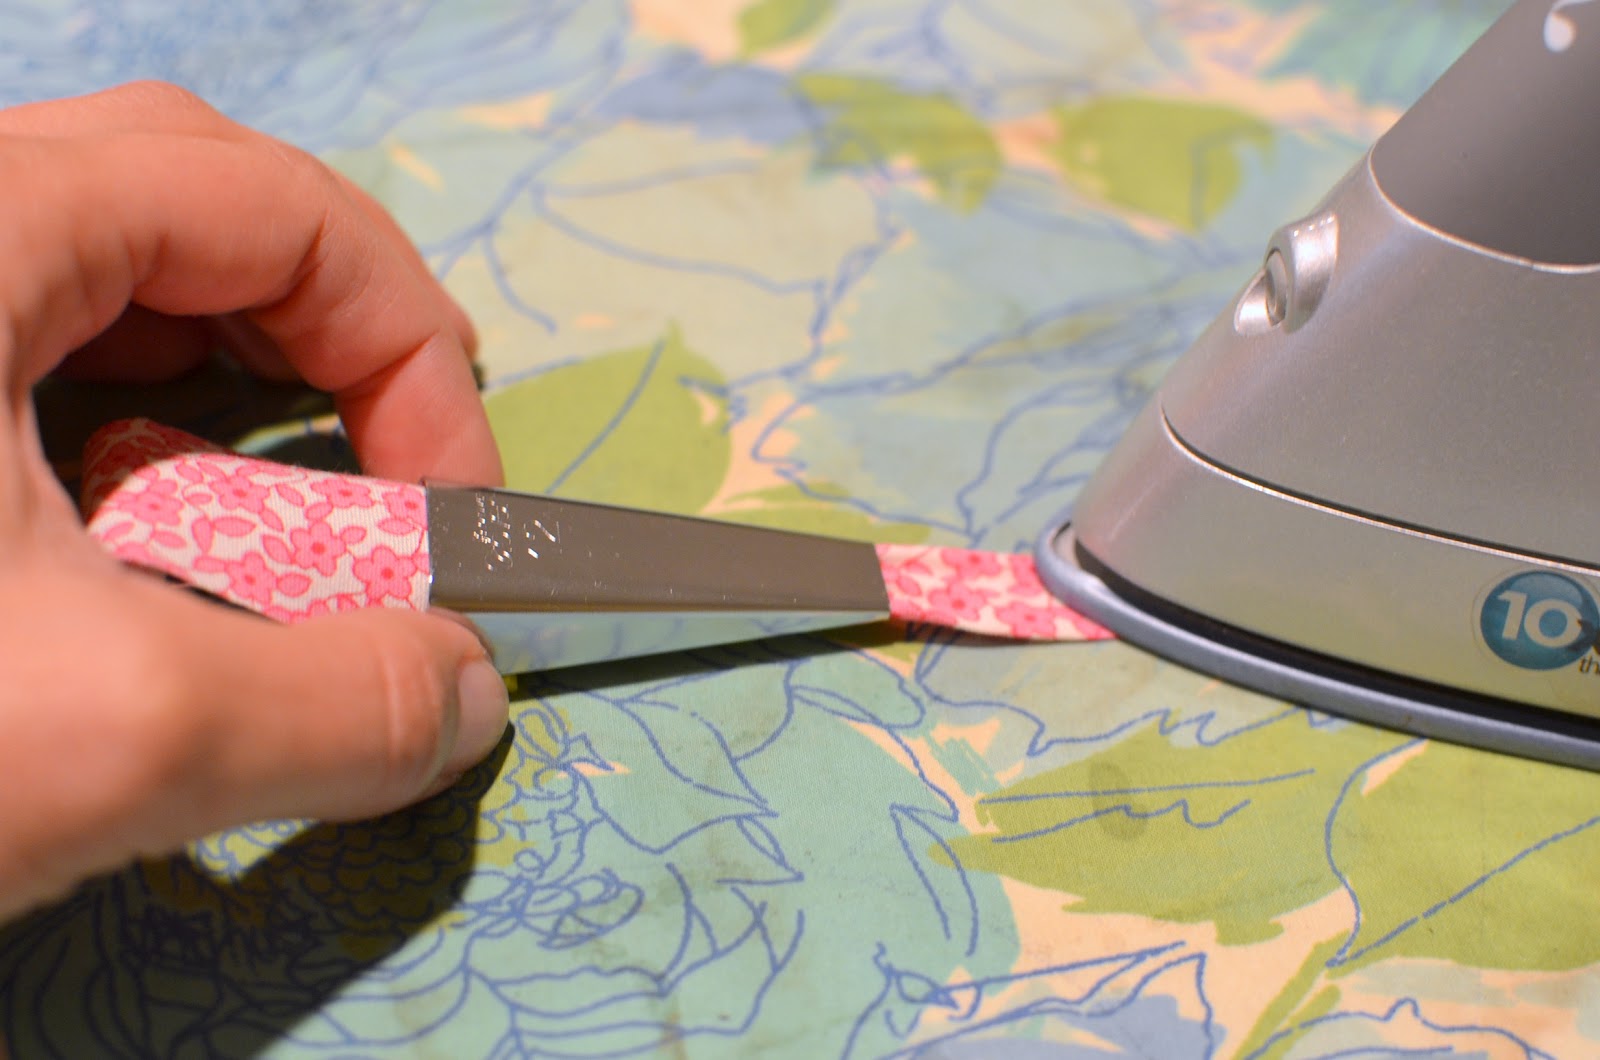
22. Your single-fold bias tape is done!

23. If you are creating double-fold bias tape, go back to the beginning of the strip and fold it in half. Iron over this new fold.

24. And, if you are going to be making a ton of this bias tape for all sorts of projects, you could cave and invest in this little machine: Simplicity Bias Tape Machine

Ta-da! Lovely bias tape made from cotton quilting fabric, just waiting for next week's project!

Check back next Tuesday for the first bias tape project!

4 comments:
I will definitely be trying this! You made it look MUCH easier than other tutorials I've seen.
oh my goodness! this looks way easier than i've ever done it! i always try to avoid bias tape because i hate making it, but it looks so easy like this! thanks sooooo much! :) lisa
Would this work to make bias cut strips for piping too?
AWESOME!!!! No waste and beautiful results. Thank you! I made lots of bias tape but never could figure out how to not waste any fabric.
Post a Comment