Showing posts with label serger. Show all posts

Thursday, January 24, 2013

Fleece Cuffs Tutorial


I found a cute mitten and hat set for little A a while back.  But...the mitten cuff doesn't cover much of her wrist, which is especially problematic in the snow and these cold New England days.


I realized it would be pretty easy to sew a longer cuff and attach it, but hadn't gotten around to it.  Then, today, we saw something similar to what I had in mind, and I wouldn't have to sew it to the mitten (score!).  For the $12.99 price, and the very simple design, I knew I would be making up a few pairs when we got home.  


The thumb hole holds the cuff in place, and the cuff is long enough to go over her sleeve.  Problem solved!  


Think you want to make some too?  This is a VERY simple sewing project - even the most beginner can do it!

You'll need two pieces of fleece.  For the kids' size, I did 6" x 6", but you could alter to make longer.  Just make sure you cut the width measurement along the stretchy grain of the fleece.

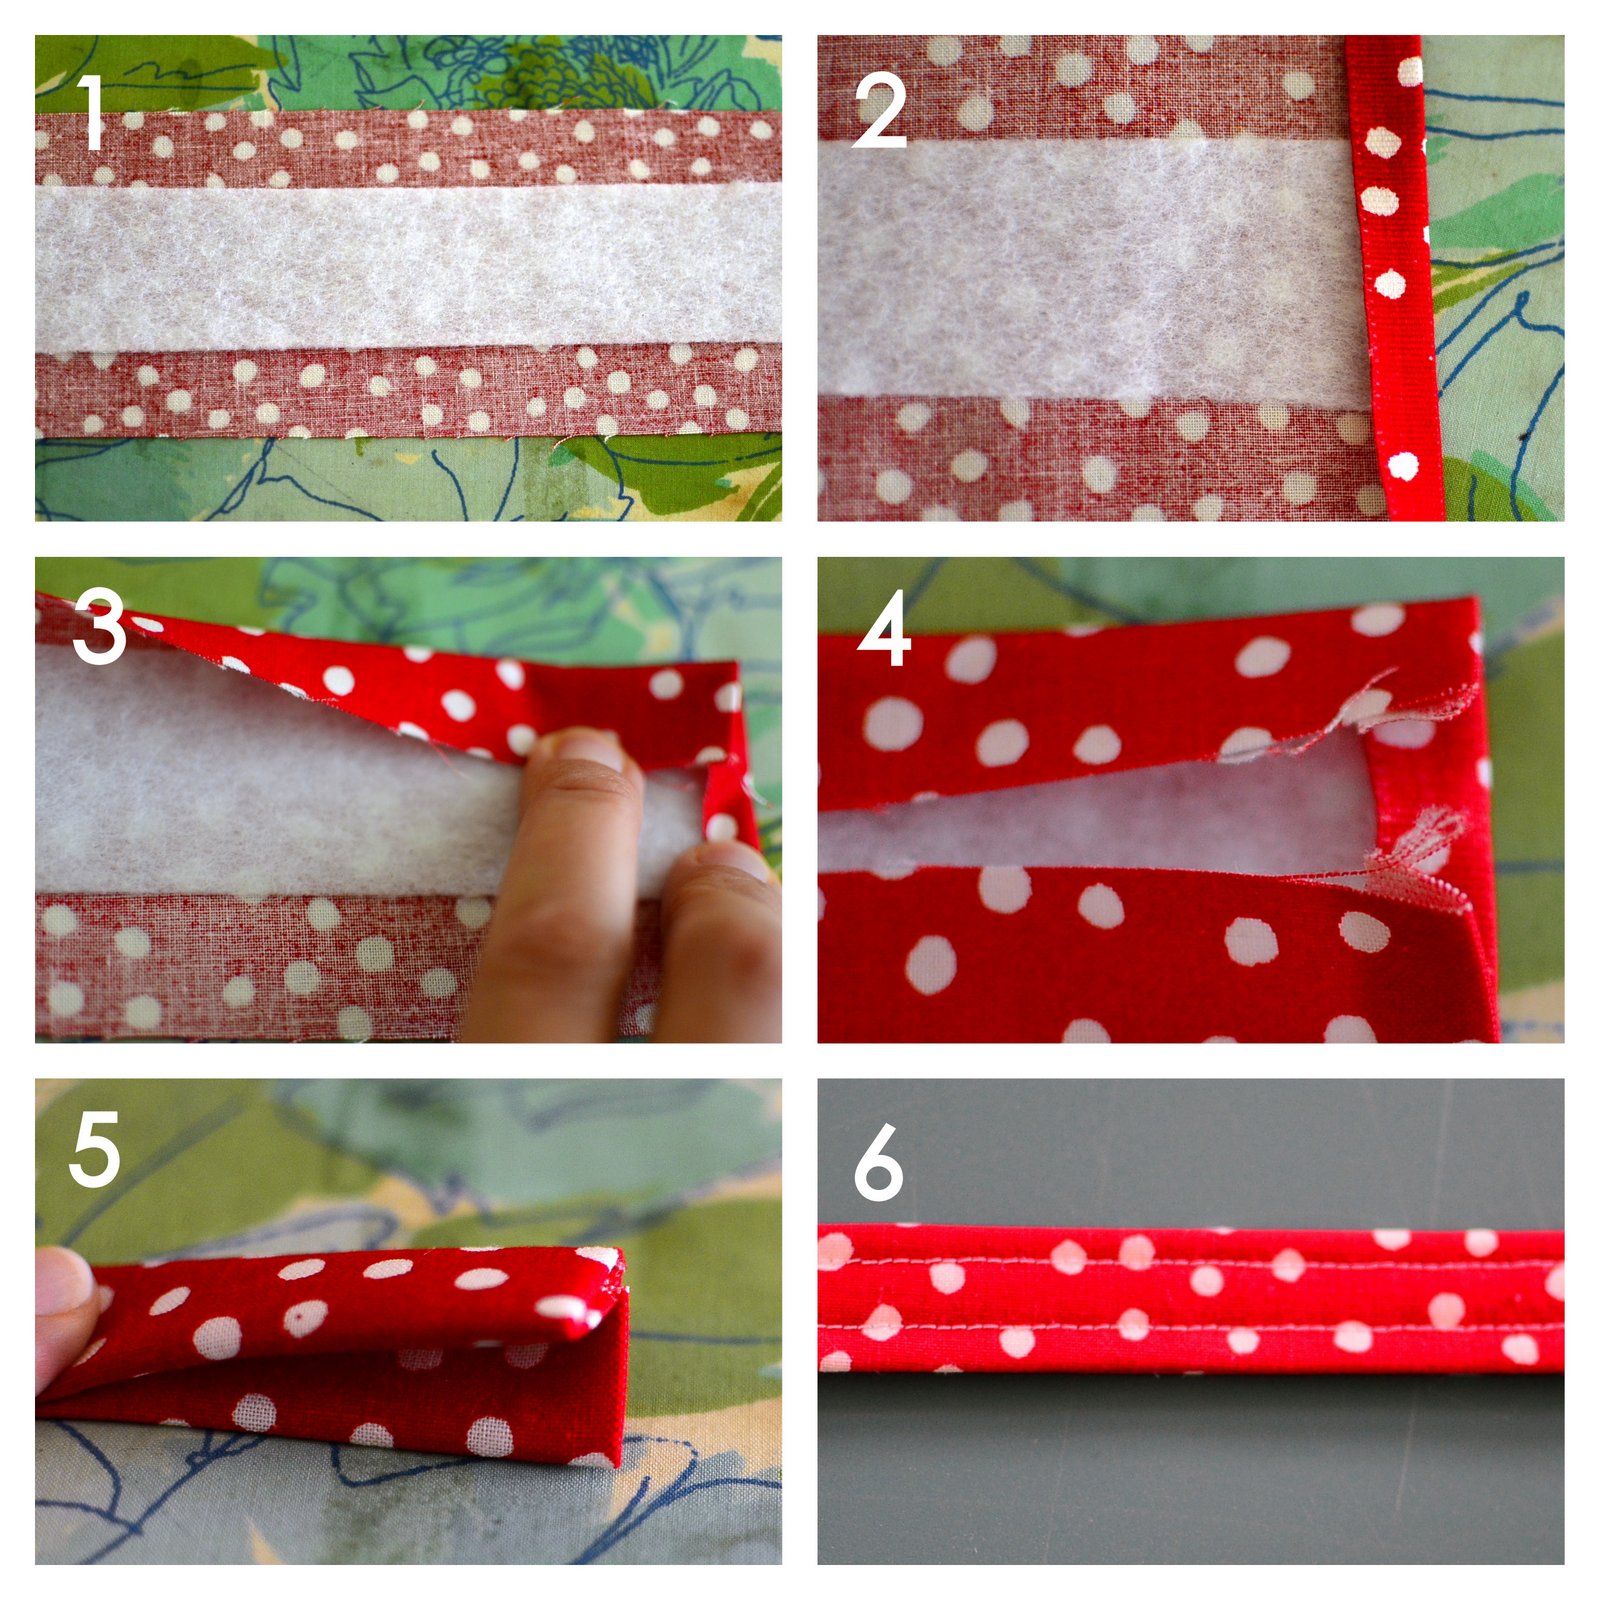
Next, finish the ends (the stretchy sides).  Really, you don't have to with fleece, but I always prefer the look.
If you don't have a serger, read on - I'll show you how with a regular machine, too!


Fold cuffs right sides together and sew the long edge (length).


Make a scant 1/2" snip on the fold 1/2" down from top edge.  


Turn right side out.  That's it!  You can wear these under gloves or mittens, or simply as fingerless mittens.  On the website of the brand we saw at the store, they make the point that kids can tuck in sleeves with these cuffs, put their coats on and STILL zip up independently!  Genius!

If you are serger-less, here's what you can do:

Zig zag top and bottom edges.  Set your machine to zig zag and turn the handwheel until the needle is on the far right of the stitch. Place your fabric under the presser foot up against the needle.  Now, when you sew, the zig zag will encase the raw edge of the fabric.  


Right sides together, simply sew the long edge with a 1/4" seam.  No need to finish.  Snip the hole and turn.


These are my size, so the measurements are 7" wide and 8" long.  I cut the hole about an inch down from the top and about an inch wide.


The very best part about these fleece cuffs?  Little ones still have access to their thumbs!  

Stay warm!


Thursday, January 10, 2013

Teeny tiny snack sacks tutorial


I will warn you: these are a little addictive to make (maybe because I keep using food-related fabric?).
If you are up for the temptation, you will need:


one 10.5" x 3.5" piece of ripstop nylon (or liner of your choice)
one 10.5" x 3.5" piece of cotton fabric
one 2" piece of velcro (poky and soft sides)


Sew the soft velcro in the center of one end of the nylon, positioned 3/4" down from edge.


Fuse wrong side of fabric to wrong side of nylon.
**If using a directional print, turn it upside down and keep velcro at top.**


Here it is fused with velcro on the inside.


Round top corners.


Finish opposite short end (serge or zigzag or bias tape, as in this tutorial).  Sew poky velcro 1" down from finished edge and centered on the fabric.


Fold bottom edge up 3.5".  Finger press fold.  If you have a craft label, sew on now.


Starting at the bottom corner, serge (or otherwise finish) around the snack sack, ending at the other bottom corner.  Fray check ends of stitching.
  
 Pack some cookies and enjoy your new teeny tiny snack sack!


Tuesday, January 8, 2013

Teeny tiny snack sacks


 We have a Daisy Girl Scout in our house (and a Daisy Girl Scout leader!).  Do you know it's almost Girl Scout Cookie time in New England?


Almost as good as those tasty Samoas is a teeny tiny snack sack to pack them in!  (Disclaimer: this is NOT a tasty Samoa featured but a cheap Target cookie - the good stuff isn't in yet!)


Just the right size for one cookie for a special lunch treat...


...and just the right size for little fingers. 


Would you like to make some?  Check back tomorrow for the tutorial.

P.S. This would also make a great change purse, small gift bag, envelope for little love notes.

Saturday, June 30, 2012

Easy Peasy PUL-lined Lunch Bag

 
School is out!  Are your little ones on the go this summer - to camp, daycare, poutings?  If so, this is the lunch bag for you! 
Have no fear of sewing with PUL!  I will show you how to make this super simple, super duper cute bag that you'll find is your go-to lunch/snack/anything bag!
 
You can customize this tutorial, too!  Do you want to zigzag the edges? pink the edges? serge the edges?  Do you want a coordinating fabric for the handles and sides?  You decide, and let's get sewing!
 
Materials:
  • two 5" x 9" panels, either of main fabric or coordinating fabric (I went with red for this bag)
  • two 5" x 9" panels of PUL
  • one 7 1/2" x 26" panel for the front/bottom/back piece
  • one 7 1/2" x 26" panel of PUL
  • one 3" x 9" piece for the handle, main fabric or coordinating
  • one 1 1/2" x 8" fusible fleece
  • two 1 1/2" pieces of pokey velcro (I know, such technical terminology!)
  • two 3" pieces of soft velcro
  • quilt basting spray (I'm a huge fan of Sulky but my local store doesn't carry it anymore!  I chose June Tailor - choose something non-toxic!)
 
1. Fuse PUL pieces to same size fabric pieces, wrong sides together, with basting spray.  This will make the fabric and PUL act as one piece of fabric - no slippery PUL to work with now!  Trim so edges match.
 
2. Finish edges of front/back/bottom piece and two side panels.  In these photos, I show serging, but you can pink or zigzag, too.
 
3. Round corners of velcro a bit.  On top front of main piece, place velcro 1/2" from side, and just under stitching on top.  Sew in place, making sure to backstitch/lockstitch.
*If you have a directional print, lay main piece with print right side up.  Sew pokey velcro to the top.  This will ensure that the print faces right side up on the front flap and front when you are done.
 
4. On inside opposite end of main piece, place 3" soft velcro 1/2" from top stitching, and 1" from side stitching.  Sew in place, making sure to backstitch/lockstitch.
 
5.  Make the handle:
  • fuse fleece to wrong side of handle piece, centered
  • fold 1/4" in at each short edge and press
  • fold long sides in to center and press
  • fold handle in half and press again
  • topstich along sides and down middle
 
  • Measure width of handle (mine is 7/8").  
 
  • Measure this width from the bottom stitching up and mark a line.  This will help you stitch an even box when attaching handles.
 

6.  Measure 1 1/2" from each side, and 5" from top.  Draw this corner (see my white dotted lines?) for handle placement.
 

7.  Place handle end into drawn corner (making sure folded edge is on the outside) and sew in place.
 

8.  Follow the bottom seam of handle and the line you drew in step 5 for your horizontal stitching.  Sew an "x" within this square to reinforce handle.
 

9.  Sew side panel to main piece:
  • line up short side of side panel (line AD) with top front of main piece (where your pokey velcro is) - wrong sides together
 

  • Backstitch/lockstitch at point A and sew to point B with a 1 cm (3/8") seam allowance.  
 
  • Stop at 1 cm before end, lift presser foot and pivot side panel piece to that line BC is now matched to the edge of your main piece.
 
  • Talk to it until it lays flat and then sew from B to C.  Repeat for remaining edge (line CD) of side panel.  Then repeat for other side panel.
* If you finished the edges with pinking shears, you will need to sew around the top flap as well.  Simply continue sewing from point D down the side of the front flap, along the bottom edge, and up the other side.  Stop when you reach your beginning stitching at point A.  Backstitch/lockstitch.
 

That's it!  You are done, and can stand back and admire your amazing new lunch bag!  
 

Or...go pack it for whatever adventure lies ahead today!


One new sewing tutorial every day.

LinkWithin

Related Posts Plugin for WordPress, Blogger...