Showing posts with label gift. Show all posts

Sunday, February 2, 2014

Just in time for Valentine's Day: easy freezer stencil totes kids' craft

 
First off, hello!  Long time no blog! 
 
Secondly, it's almost Valentine's Day!  Are you getting ready to celebrate? 
 
The girls and I created these easy freezer stencil bags for their teachers (if J.Z. is reading this, spoiler alert!).  It was fun to get back to some crafting and be able to do it with little E and A.
 
 
Disclaimer: this bag is pretty much a knock-off of one I have from Old Navy.  I LOVE it and thought the teachers would find it handy and cute.  We found a 3 pack of medium totes at Joann's and some Tulip Soft Matte fabric paint.  Oddly, the pink and yellow were sparkly, but you cannot tell from the outside!  A roll of freezer paper from the local grocery store and we were good to go.
 
 
Little E dabbing on the yellow.  We found these thick, strong brushes were best to really get the paint in all the grooves of the canvas.
 
 
Little A's hand moving at super speed!
 
 
This one is done and drying...
 
 
...and the big reveal.  It was really cute to watch the look on the girls' eyes as they peeled back the paper.  I love how the "messy" heart turns into clean lines. 
 
 
Here are three of the six we made.  With four paint colors, we managed to make all six different.  This was the perfect project for the little ones - they could be messy and inexact, and it didn't take too long to dry so their interest was maintained.  I loved that they thought of their teachers as they picked colors, reasoning who would like which combinations.
 
We are blessed with wonderful teachers and we hope we make them feel special this Valentine's Day with our gifts.


Friday, October 25, 2013

Orange and Pink


This fall, oranges and pinks seem to abound.  My eye is drawn to this vibrant combination, and I can't seem to get enough!


While walking through Joann's a few months ago, I spotted this fabric.  I couldn't resist scooping it up - especially with two new baby friends in the world.  


Two simple baby blankets, with rounded corners and a cozy chenille backing.  Perfect for that tummy time, and totally machine-washable for the mamas.  I hope the baby girls love the colors and print as much as I do!  Perhaps I'll inspire a (very) early love of fabric.

Wishing you a vibrant day!


Sunday, September 22, 2013

Falling into Fall: Halloween Wreath


It's the first day of fall!  For us New Englanders, this means the promise of apple picking, leaf peeping, and, of course, Halloween! 


As an early house-warming gift for a friend, I made this Halloween wreath.    A simple grapevine wreath spray painted with Krylon Pumpkin Orange Interior and Exterior Decorator Paint (took a few coats to get in all those nooks and crannies!).  I followed this tutorial to make the flowers - altering the length and width of the fabric strips for the various sized flowers.

Between the paint and rolled flowers, it only took an evening.  I love projects like these - quick, simple, uses materials on-hand - and yields a beautiful result!


Now I have to go out and make more for myself!  I have a few other flower styles I want to try - maybe black, gray and white felt? 

What's your favorite part of fall?


Thursday, March 7, 2013

Urban Haute Apron from Modern Vintage Designs


Just popping in to share this project from last month!


My mom and the girls have a special thing with matroyshkas, so I knew this fabric was perfect for a birthday apron.


I love the bit of gathering in this apron and the waistband.  Feminine without being over the top.
And...I'm getting some use out of my dressform.  She's my model for the apron!


Sunday, January 27, 2013

Pleated Clutch from Charm Stitch


Every year, my high school friends and I do a holiday gift exchange.  Over the years, it has turned into more of a gift-card exchange.  Being a sewist, I always like to make a little something to make the gift more personal.


I found this tutorial from Charm Stitch and thought it would be perfect for my always-fashionable friend.  I didn't create my own design on the fabric as they suggest, but I did fuse batting to the lining fabric, and add the handle and flower pin...


...and a black metal zipper.


I love the pops of yellow against the simple black and white.  (I was tempted to use hot pink, but figured this was a bit more classic/conservative.  I think she would have gone for pink, though, raised in the '80's on Cyndi Lauper and Madonna!)


Just the right size for a coffee gift card.


This is the first flower I made for it, but didn't think there was enough contrast.  Also, I'm much happier with the finished edge on the final flower vs. the frayed edge on this one.

It was fun to sew something new, and the pattern was well-written.  Thank you to Charm Stitch for sharing!


Thursday, January 3, 2013

Cranberry Orange Relish


Every year, we like to give a little something for the holidays.  This year, I wanted to share my mom's Cranberry Orange Relish.  The color is gorgeous, and its sweet and sour combination is perfect on a sandwich or as a side dish. I have eaten more than my fair share this season!


Living in Massachusetts, we are lucky to find fresh bog berries (three times the size of the Ocean Spray ones!) at the local market.  This recipe is so easy, yet makes a unique treat.


Cranberry Orange Relish

4 cups cranberries, washed and picked over
1 whole navel orange, washed, ends cut off, and cut into eighths
1/2 cup sugar (or more to taste)

Place cranberries, orange pieces and sugar in the food processor.  Pulse until cranberries are finely chopped.

Let relish sit in refrigerator overnight.  Taste and add more sugar as desired.


That's it!

I'm roasting a chicken now just so I can eat the relish tonight.  It's also so tasty on a turkey cheddar panini!

Enjoy!


Wednesday, December 12, 2012

Business card holder from The Crafty Cupboard: with a twist


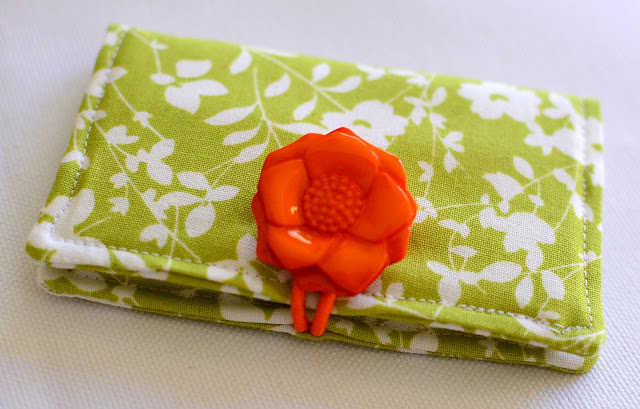
I LOVE this business card holder pattern from The Crafty Cupboard.  I made my first one to match a new spring bag and loved having a special place to put my crafty card.  When a friend requested one for her growing photography business, I had an epiphany.


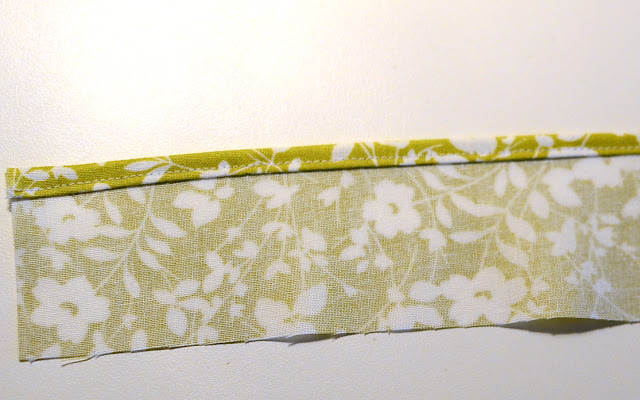
To hem the top of the pockets, Melanie has you fold 1/4" and fold 1/4" again and press.  I don't know about you, but my fingers and iron don't get along - especially when folding tiny hems!  BUT...I did just treat myself to a few new hemmer feet, which are perfect for this job!

To use a hemmer foot to make the pocket hem, I cut one piece for the pocket 2 1/2" x 10" (instead of two 2 1/2" x 4 1/2" pieces).  My math is not off - I gave myself an extra inch to get the rolled hem going.


I found this tutorial that explains how to get the rolled hem started.   Sew about an inch and leave a long thread tail.


I found finger pressing 1/4" helped make it feed through the foot more evenly.


Start feeding the raw edge into the foot, using the long tail to help manipulate from the back.


Guide the fabric over the coil in the foot.


Gently use the long thread tail to pull the fabric as you start to sew.  See how the fabric on the right is going into the foot and folding over on itself?  And, more importantly, see how it is coming out on the left side all pressed and sewn!?


Here it is done (in seconds!). 


Now, take your 2 1/2" x 10" piece and cut into the required two 2 1/2" x 4 1/2" pieces.  Discard the extra inch (if the beginning of your hem was a bit wonky, throw that part away!).


Continue following the pattern as written and you'll have a swanky new business card holder in no time! 


Thursday, December 6, 2012

Zippered Yarn Sacks from Just Crafty Enough


Hey there!
Just a quick pop in to share my latest completed project - zippered yarn sacks from Just Crafty Enough.  The only change I made was to round the corners before sewing.  The first two have a slightly rounded corner.  The yellow polka dot has a larger rounded corner.  I think I prefer the smaller.  What do you think?


There are a few knitters in my life who will be receiving these for Christmas.


I love the eyelet for the yarn to pop through!  No more balls of yarn rolling all over the floor while you try to knit.  And, a set of three might keep projects that use more than one ball from getting all tangled (ask me how I know these things!).


I'm especially excited about the yellow and gray fabrics - two of which I recently bought at Stitch Lounge - a very fun new find in Western Massachusetts.  If you are local, you definitely have to check out Jenna's space - it's just lovely!
 
A peek inside at the coordinating fabrics.
Hope you are enjoying some crafting-for-the-holidays!


LinkWithin

Related Posts Plugin for WordPress, Blogger...