Saturday, January 3, 2015

DIY Stuffed Animal Shelf


Happy New Year!

In the spirit of resolutions to get organized, I have a quick and easy project for you today.  I'm not going to lie - we have a bit of a problem with stuffed animals in our house.  Try as we might, we can't seem to pare them down at all.  They all have a back story (even the flimsy ones from various fairs and carnivals)!  So, instead, we built them a spot so they won't keep clogging up closets.


All you need are two 1 x 4s and one 1 x 2 boards.  Ours were 10 feet long but you could do any length.  Sand them down a bit to smooth out ends.  We painted ours first, but you could wait until they are assembled, too.  We didn't paint the back or bottom.  


Nail the two 1 x 4s together at a 90 degree angle.  (The bottom board of the shelf should butt up against the back, giving you the most width.)  Then attach the 1 x 2, having the bottom board butt up against that.  


Find some stuffies for quality control.  Is it me, or is that cat smiling extra wide?


Side view: you can see how their bottoms nestle in to the ledge and don't slip out.  


We took the entire shelf and screwed it right into the studs of the wall (a stud finder, drill and husband are all very handy at this point!).  


Dig out all your stuffies from drawers, closets, underneath blankets, etc. and line them up.  Don't they look happy?  


Thursday, November 27, 2014

Saturday, August 16, 2014

Happy Valley Dog: hands-free leash review and GIVEAWAY!

Seems like I start every post lately with "long time no blog", but when I logged on and saw my last post was Easter!?  Yikes!

I do have an excuse!  Ever since last fall, I've been getting back into running.  In fact, I ran my first 10K in the spring!  For me, that was a huge accomplishment - setting a goal in the fall and working towards it - even running all through the New England winter - outside!

Photo: Carb loading post race with Melissa Gould.
Ooops!  We're not running in this photo! 

All along, I have had the best training partner - this guy!  Normally, he's a pokey walker, stopping to sniff every plant.  But, when his harness is on, he knows it's go time.

Photo: Christmas run with my furry running buddy.
Christmas morning - sky is blue but temps were low!
 
Skip ahead to this spring, when my friend Jen of Happy Valley Dog asked me to try out her hands-free dog leash.  Ever since our first run, it's the ONLY leash we use!  It's totally adjustable and gives just enough leash length without us getting tangled up.  It's sturdy enough for me to grab if I need to pull him closer, but still lightweight enough to be comfortable. 
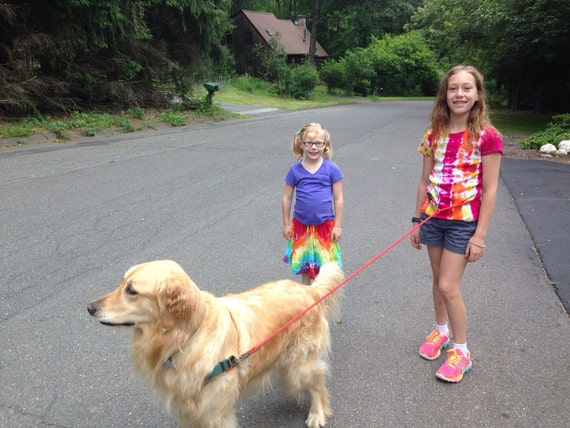
Jen's girls with their dog Mason.

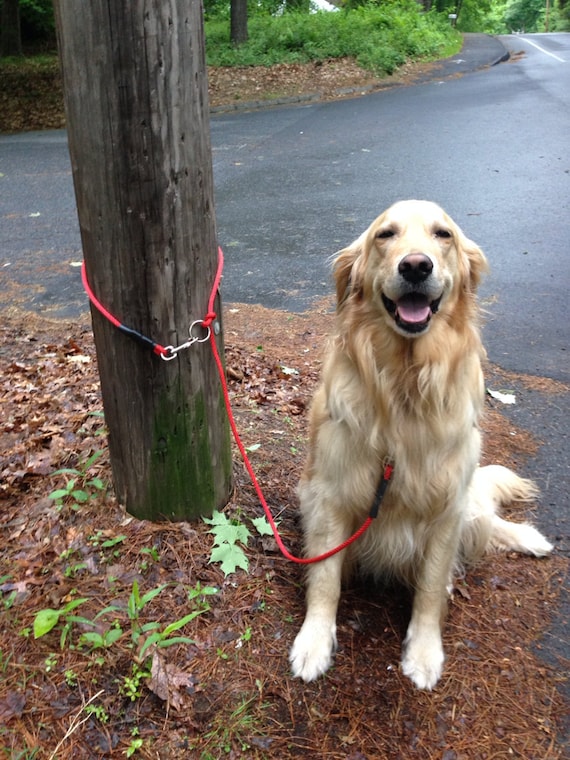
My girls had fun using it (it adjusts to their tiny waists) to take the dog for walks this summer.  And, with the clips on both ends, I can use it to clip the dog to a post (especially helpful if I need to hose him off!). 
Good boy, Mason!

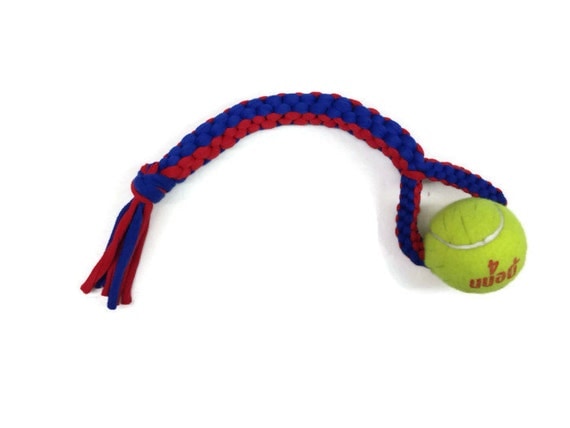
I'm so happy with this leash - we immediately bought one for friends who have a new puppy!  Jen also makes these amazing dog toys out of repurposed t-shirts.  Our friends' puppy couldn't get enough of his (I don't have any clear pictures of him playing with it because he was so excited - all the photos are blurry!). 
Red and Blue Dog Toy, Upcycled T-shirt and Tennis Ball, Super Strong Dog Tug
Like what you see?  Good!  Jen is generously giving away one of her adorable dog toys to one lucky reader!  All you have to do is leave a comment about your favorite product in her shop (and your email so I can contact you!).  For an extra entry, you can like her on Facebook.  Just leave a comment that you did.

   Giveaway will close Sunday, August 24th at midnight EDT.

I'll be back soon with another review - this one just in time for school to start!

Thursday, March 6, 2014

Kids' craft: repurposed owls

 
I stumbled across this adorable tutorial for paper tube owls through Craft Gossip.  Seemed just the thing for the resident preschooler home on a chilly afternoon.  The first grader jumped right in when she got home from school.  What a great project when both kids are equally engaged!

 
I always love crafting with the kids because theirs come out SO much more creative than mine!  Can you tell which one is mine?  Hint: it's the most boring by far!

 
I hope, by creating these owls, we are inviting spring to arrive (any day now, PLEASE!) in New England.  I'm pretty sure I have been smelling it in the air, despite the piles of snow and frigid temperatures.  Call me crazy!

Sunday, February 2, 2014

Just in time for Valentine's Day: easy freezer stencil totes kids' craft

 
First off, hello!  Long time no blog! 
 
Secondly, it's almost Valentine's Day!  Are you getting ready to celebrate? 
 
The girls and I created these easy freezer stencil bags for their teachers (if J.Z. is reading this, spoiler alert!).  It was fun to get back to some crafting and be able to do it with little E and A.
 
 
Disclaimer: this bag is pretty much a knock-off of one I have from Old Navy.  I LOVE it and thought the teachers would find it handy and cute.  We found a 3 pack of medium totes at Joann's and some Tulip Soft Matte fabric paint.  Oddly, the pink and yellow were sparkly, but you cannot tell from the outside!  A roll of freezer paper from the local grocery store and we were good to go.
 
 
Little E dabbing on the yellow.  We found these thick, strong brushes were best to really get the paint in all the grooves of the canvas.
 
 
Little A's hand moving at super speed!
 
 
This one is done and drying...
 
 
...and the big reveal.  It was really cute to watch the look on the girls' eyes as they peeled back the paper.  I love how the "messy" heart turns into clean lines. 
 
 
Here are three of the six we made.  With four paint colors, we managed to make all six different.  This was the perfect project for the little ones - they could be messy and inexact, and it didn't take too long to dry so their interest was maintained.  I loved that they thought of their teachers as they picked colors, reasoning who would like which combinations.
 
We are blessed with wonderful teachers and we hope we make them feel special this Valentine's Day with our gifts.


Thursday, November 14, 2013

Giving thanks...for kids

Last year, I shared this link for a great family Thanksgiving activity.  We just pulled it out and read over what we wrote.  It was cute to see the kids read their responses. 

Thanksgiving printable for kids.


This year, I found this via Craft Gossip and wanted to share with you.  It would be a great project for school, or home, either before or on Thanksgiving.

Hope you are finding many reasons for giving thanks! 

Tuesday, November 12, 2013

New Blog Button...finally!

Jane Of All Trades


After working on it way too long yesterday, I finally figured out how to include a blog button (at the request of one lovely reader - thanks, N!). 

If you are in a similar boat, look no further than HERE. It took me all of 3 minutes!  Not bad for a severely inept techy like me!

Feel free to grab the code and post the button on your blog - especially if you've referenced one of my tutorials.  Share the love! 

Sunday, October 27, 2013

Custom Halloween Pillows


A while back, I fell in love with this pillow.  It was on my list of Halloween crafts, but I just hadn't found the right template for my oversize couch pillows (remember them from this?). 


Flash forward a few weeks, and I found the above skeleton sketch in the trash!  Little E had drawn it to carve on her pumpkin, but didn't like it after all.  I pulled it out, enlarged it on the copier and turned it into a felt applique for the pillow cover.  Instead of a blanket stitch, I made coordinating felt piping (see here for the how-to).  I didn't have to worry about cutting on the bias because the felt is stretchy enough with the straight cut.  I basically followed these directions to make the pillow. 


With one pillow done, I was inspired to cover the other two in the same fashion.  Little E supplied the ghost.  Little A was more hesitant to draw on demand, so I found one of her drawings of a happy face and turned the hair into a stem.  Can you keep a straight face when you look at him?

 
I'm so excited to have festive, custom pillow covers for the Halloween season.  They are even more special because they are based on my girls' art work.  I know we'll have fun pulling them out every year and remembering their 4 and almost 7 year old versions of these Halloween classics. 


Friday, October 25, 2013

Orange and Pink


This fall, oranges and pinks seem to abound.  My eye is drawn to this vibrant combination, and I can't seem to get enough!


While walking through Joann's a few months ago, I spotted this fabric.  I couldn't resist scooping it up - especially with two new baby friends in the world.  


Two simple baby blankets, with rounded corners and a cozy chenille backing.  Perfect for that tummy time, and totally machine-washable for the mamas.  I hope the baby girls love the colors and print as much as I do!  Perhaps I'll inspire a (very) early love of fabric.

Wishing you a vibrant day!


Thursday, October 17, 2013

Halloween wreath, take two


A few weeks ago, I shared this wreath, with some thoughts on a second version.  Miracle of crafting miracles, I actually made a second version!  
 
 
Same grapevine wreath, but different paint.  This time, I used Rust-Oleum American Accents Ultra Cover Gloss in Real Orange.  I was really happy with the color, shine and coverage, even with the first coat. 
 
For the flowers, I loosely followed this tutorial.  The cream and yellow flowers were made with 2 1/2" circles, while the smaller gray ones were made with 1 1/2" circles.

 
I cut a simple 3" strip of felt with this and tied it to the top with a simple overhand knot. 
 
Except for my uber-procrastination, this project would have taken about a night.  I think I might be slightly addicted to this spray paint/wreath/fabric flower wreath project.  Don't be surprised if you see a few more (dozen) in the future! 
 
What are you doing to decorate for Halloween?  If you are looking for some other fun, simple projects, check these out:


Sunday, September 22, 2013

Falling into Fall: Halloween Wreath


It's the first day of fall!  For us New Englanders, this means the promise of apple picking, leaf peeping, and, of course, Halloween! 


As an early house-warming gift for a friend, I made this Halloween wreath.    A simple grapevine wreath spray painted with Krylon Pumpkin Orange Interior and Exterior Decorator Paint (took a few coats to get in all those nooks and crannies!).  I followed this tutorial to make the flowers - altering the length and width of the fabric strips for the various sized flowers.

Between the paint and rolled flowers, it only took an evening.  I love projects like these - quick, simple, uses materials on-hand - and yields a beautiful result!


Now I have to go out and make more for myself!  I have a few other flower styles I want to try - maybe black, gray and white felt? 

What's your favorite part of fall?


LinkWithin

Related Posts Plugin for WordPress, Blogger...