Tuesday, October 30, 2012

In retrospect...a pattern review

Caroline from Sew Can She recently asked me to guest post on her blog.  I got to pick whichever tutorial I wanted to try out and then post about it.  What follows is what will be posted on her blog:

Hello, Sew Can She readers!  I'm popping over from my blog, Jane of All Trades, to share my latest project - the Retro Travel Bag from Melissa Mortensen.

Before Caroline asked me to guest post, I had bookmarked this bag as a must-do.  Melissa's choice of fabric and color combinations is adorable!  I'm a girl who likes a challenge, and a new bag!

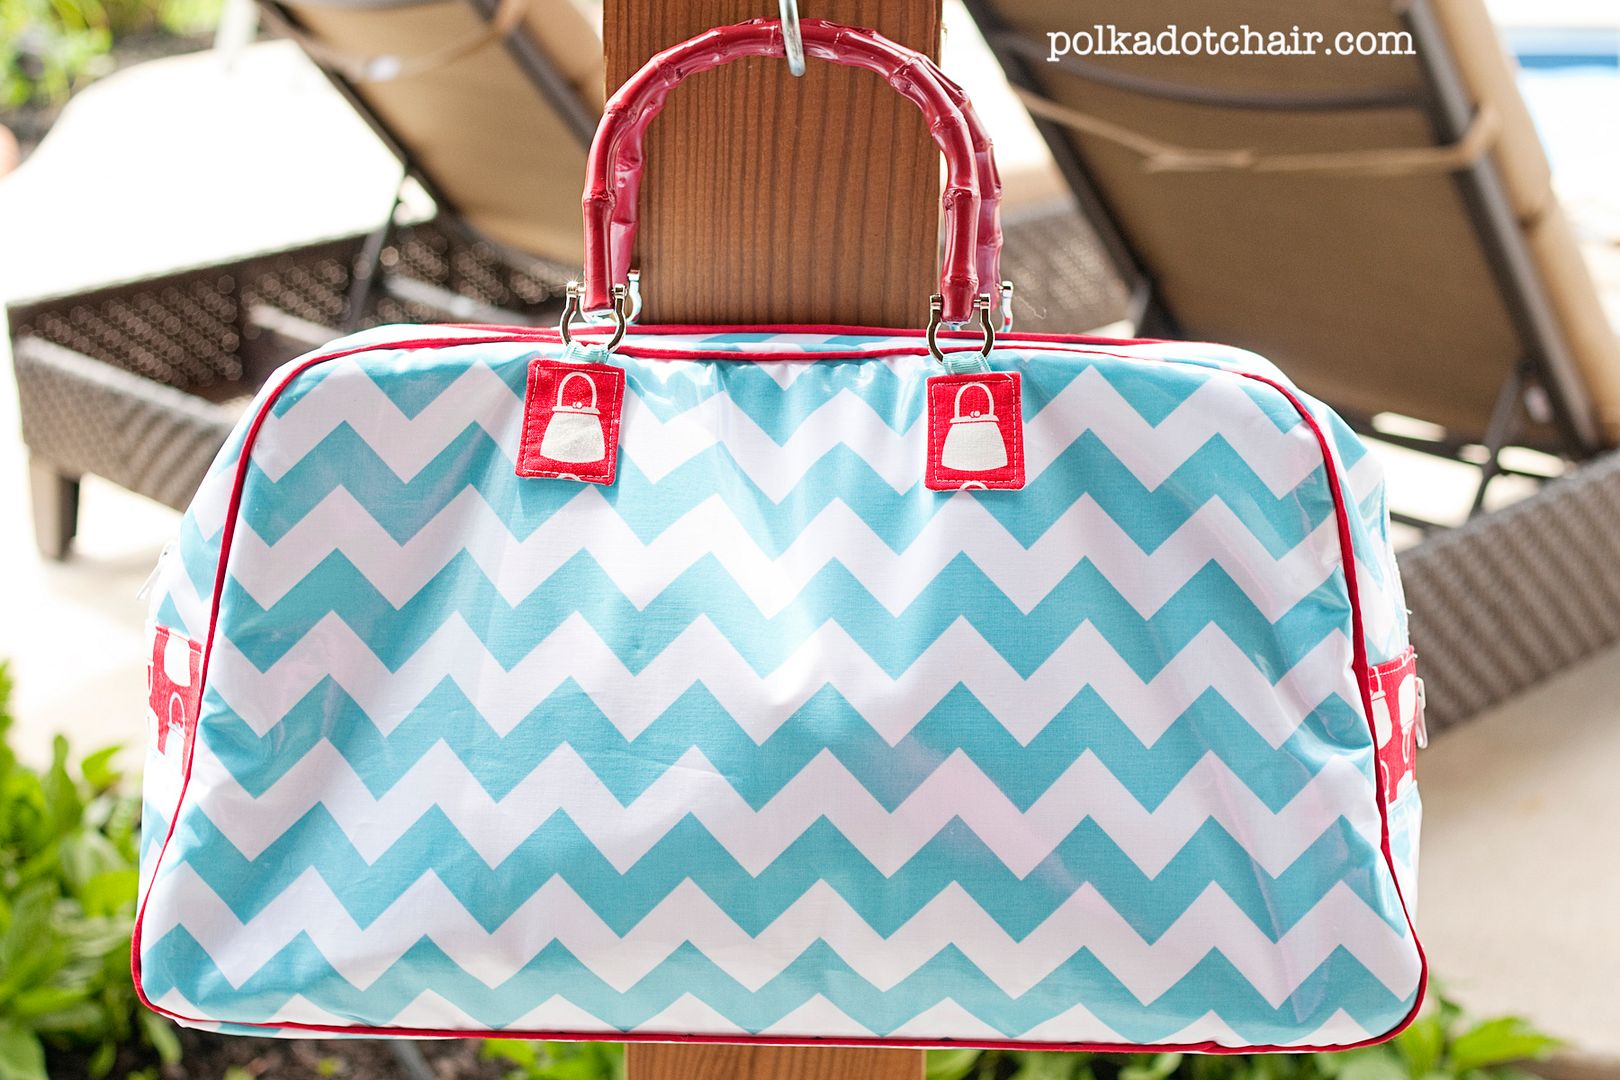
Here's Melissa's version:


For fall, I wanted something a little different.  I remembered I had a red tweed-ish fabric (intended for a skirt years ago, but never made it out of the stash) that I thought would be cute for the autumnal version of Melissa's bag. 

Here's my version: 


It ends up being much bigger than I had expected, but definitely a travel bag.  (For measurement's sake, I fit 6 rolled up beach towels in it!)  Now I'm even more excited for an upcoming get-away weekend with Mr. Jane of All Trades!

In retrospect, I wish I had either used a brown tone for the bias/lining/piping/handles, or a softer gray color.  The black is just a bit too much of a contrast.  I didn't realize until I started working closely with the fabric that it has a bit of a rust color in the weave.  Oh well.   Hopefully I'm the only one looking that closely!

As for the pattern itself, she is correct in stating that this is an intermediate/advanced pattern.  To pace yourself, I suggest cutting all fabric and interfacing one night, sewing exterior another night, and sewing interior and putting it all together a third night.

Also, I realized there were no seam allowances included!  I did my best to guess based on what I was sewing (piping, bias tape, zipper) and it, luckily, all matched up.

For the piping around the outer edge, I started by folding down about a half inch, as show below, and sewing this down.


At the end of the piping, I overlapped the end with the previously-folded part and sewed over, as shown below. 


Then snip the ends within the seam allowance, as shown below. 


The result is a nice, almost-seamless joining of piping.  I suggest doing this at the bottom so it is less noticeable. 


Another minor change was in making the handle tabs.  The pattern has you sew the pieces, turn right side out and then fold in a 1/4".  Maybe I'm just not good at this, but I highly prefer pressing the 1/4" first (wrong sides together), and then sewing right sides together and turning. 


I didn't have the required length for the Timtex/Peltex bottom so grafted two pieces together.  I think it works better to overlap the two pieces by a fair amount (about 4" here).  This ensures that the bottom stays rigid, despite the two pieces.  I simply zigzagged over the edge to attach. 
 
 Here's a peek at the inside of the bag - a lined pocket edged with bias tape.  This would definitely be big enough to store toiletries tall and wide (hairbrush, hairspray) as well as wallet, phone, etc. 


If I were to make this bag again, I would love to try a gray tweed/wool (a leather piping would be super chic).  I also think an exterior pocket would be easy to add (just follow the directions for the interior pocket but attach to one exterior piece before adding piping) and perfect for sliding your travel literature - magazines, books, print-outs of directions or coupons! 

Thanks, Caroline, for asking me to guest post. If it weren't for this opportunity, I probably would have just admired Melissa's bag instead of jumping in and making one for myself! 
 

Sunday, October 28, 2012

Handmade for Kids Holiday Fair

If you are a local (to me) resident and have kids, check out this coming weekend's Handmade for Kids Holiday Fair.  I'll be there (that's my whale bib on the right in the flyer!) along with many other talented crafters!  Find out more here.  Hope to see you there!

Tuesday, October 23, 2012

Candy Corn Bunting tutorial


For this week's installment of Bias Tape Tuesdays, we are making something so easy and festive, and it's a great use of bias tape - the holiday bunting! 


If you are looking for a quick project to add a little Halloween spirit to your home, look no further!  With a few cans of spray paint, some burlap fabric and your homemade double-fold bias tape, you can whip this up in no time (don't forget the candy corn for inspiration and crafty energy!).


1. Decide how big you want your triangles - mine are 6 1/2" sides x 5 1/2" base (the part that gets sandwiched in the bias tape).  Cut as many as you want for your bunting.  Then, using painters tape, tape off the top and bottom.


2. Find a safe spot to paint the fabric.  I taped mine down on craft paper outside. 


3.  Spray away!


4.  When dry, peel the tape.  Almost looks good enough to eat!


5.  Once the orange paint is dry, tape over it and spray the top point white and the bottom portion yellow.  (I was using burlap already in my stash.  In retrospect, this would have worked better with white duckcloth - then I wouldn't have to spray the top white!)


6.  Once dry, peel the tape and reveal your burlap candy corns.  Make coordinating double-fold bias tape following this tutorial.  Mine is 1/2".   I love how the fabric I found has the yellow and orange stripes to match the candy corn pattern (and I managed to find it while the 3 year old was running around hiding in Joann's).


7.  Sandwich your burlap candy corn in between the folds of the bias tape.  Pin in place.


I spaced mine about 1" apart and left an ample amount of bias tape on either end for hanging.


8. Starting at one end, start sewing, making sure to enclose all points of candy corn in the bias tape.  Continue sewing to other end.


That's it!  A beautiful, easy decoration for Halloween!
 
 
Hang it up, admire your craftiness and eat some real candy corn while you do! 


Tuesday, October 16, 2012

Kids' Art Smock made with reusable shopping bags: a tutorial


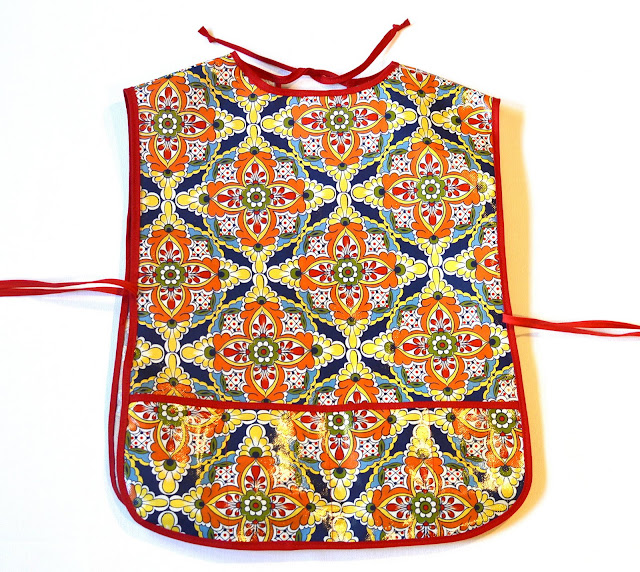
Last week, I gave away a handsewn oilcloth art smock
Did anybody notice all the bias tape binding on it? 
Would you like to make your own?


You can make this with any material (preferably something waterproof and wipeable).  Oilcloth can be hard to find and doesn't have a huge variety of prints (that I can find).  Laminated cotton is just super expensive for a project that is going to be used for kid's art!  So...I opted for those cute, cheap shopping bags they now seem to sell everywhere!

This smock has a pocket with spaces for all your "arting" materials.


For this project you will need:
one patterned reusable shopping bag
5 yards 1/4" wide double-fold bias tape (make your own following this tutorial!)


Step 1: cut off the sides of the bag


Step 2: cut the top and handles off the bag


Step 3: fold the bag, right sides together


Step 4: trace and cut out one front, one back and one pocket piece
(pattern here)
To print pattern, select "actual size" and "poster" to tile pages.  Overlap at least .5".


Step 5: sew binding to top of pocket (see here for how to)

Step 6: pin and then baste pocket onto front of smock
mark the pocket binding in fourths  (hard to see my pins in the photo!)
and sew straight down, making sure to backstitch at the top edge


This is the back side of the front - you can see the stitching much better - basting around the edge, and three sewn lines to create four pockets


Step 7: sew binding around back opening


Step 8: sew shoulders, making sure to backstitch at beginning and end of seam


Step 9: measure 7" from one end of bias tape
at the 7" mark, pin to one side of neck


Step 10: starting at end of bias tape, stitch bias tape together and then continue past pin to sew bias tape around neckline.  Continue 7" beyond back opening edge (where bias tape overlaps).


Step 11: Cut four 10" pieces of bias and sew along each long end
knot one end of each tie
sew to smock about 3" above pocket binding on front left and right
sew to smock back, matching placement from front ties

Step 12: starting at the bottom center back, sew bias tape around bottom, up side, around armhole, down front side, across front bottom, up other front side, around other armhole, down back side and finishing at starting point (see here for how to finish).  As you sew, make sure you encase the ends of the four ties.

It should look like this when done! 


 Now, try it on your little ones and see what they choose to create! 


Friday, October 12, 2012

Winner winner

Happy Friday!
 
Thank you to everyone who checked out my book review of Show Me a Story: 40 Craft Projects and Activities to Spark Children's Storytelling.  I'm especially thrilled to know word is spreading to educators and crafty families alike!
 
And now...for our winners!

The winner of Emily's lovely book is:

 
K Howard who said: "Me and my boys would love this book and my niece would love the smock! The boys love it when I make up a story that features them as the leading characters. Along the way, I start asking them what happens next and before I know it they take over telling the story!"
 
And the winner of the handsewn oilcloth smock is:

 
Cindy who said: "Right now my 3 year old just loves to go on "fun adventures' with his dad. So we love telling stories of his real 'adventures.' We also love telling stories of fictional adventures that we know he would love to go on some day. It's fun to include elements of fantasy in some of our made up adventures too. It's exciting too see where his (and our) imagination will take us.
What a wonderful book that Emily has created. I am going to suggest our local library and my school library buy a copy."
 
Congratulations to you both!  Please email me and let me know your address to send your goodies!


Tuesday, October 9, 2012

Bias Tape Made Easy tutorial (with a sneaky trick)


Last week, I introduced the Bias Tape Tuesdays series.  In this series, I will feature a different tutorial each week that uses bias tape in various ways.  (For a great discussion about bias tape, see here.) 

You could easily just go to the fabric store and buy the prepackaged bias tape, but it is made out of a polyester fabric.  For my taste, if I am using good cotton fabrics for a project, I don't want to use a lesser-quality fabric for the finising.  And, you are stuck using the colors available - and no cute prints!  To remedy that, I offer the Bias Tape Made Easy Tutorial (with a sneaky trick to make it great every time). 


To get us started, we need to learn how to fearlessly make yards and yards of gorgeous bias tape.
In this tutorial, I show you how to use a half yard of fabric (to yield 17 yards of bias tape!) but any size rectangle would work.
 1. Fold fabric with selvages together.
 
2. Cut off selvages.

 
3. Fold up one corner of fabric at a right angle.  Press.
 
4.  Cut along the pressed line.

 
5.  Without turning or flipping the cut triangle, move it from the right side of the fabric to the left.  Line it up with the left edge of the fabric.

 
6.  Pin the triangle and left side of fabric, right sides together.

 
7.  Sew this seam with a 1/4" seam allowance and press open.  You will now have a parallelogram of fabric (you know - a tilty rectangle). 


8.  Starting on the right side (where you folded, pressed and cut the triangle), line up your ruler along the cut edge.  Measure whatever width you need for your bias.  In this case, I am making 1/4" double fold bias tape, so I measure 1 1/4".

 
9.  Continue to measure this width across the fabric, staying parallel to the cut 45 degree edge on the right. 

 
10.  Continue lines over seam from step 7.


11.  Sneaky trick: when you are done marking these lines, mark a line 1/4" down from top edge of parallelogram.  Repeat for bottom edge.

 
12.  Now, you are going to take the long edges of the parallelogram (where you just marked the 1/4" line) and put them right sides together.  As you work, the fabric will start to twist a little - THAT'S A GOOD THING!


13.  To start, you want one edge of the fabric to overlap the other by one measured width from step 8.  You are going to pin right where the measured width line and the marked 1/4" line cross.


14.  As you pin through the fabric, it should look like this from the front (see how the pin goes through the intersection of those two lines?)..

 
...and this from the back.  If you have them lined up correctly, the pin should go through that same intersection point on the back of the fabric.  If not, take the pin out, shift the fabric and redo.  As your fabric is cut on the bias, it should have a little more stretch to it, which can be helpful at this point.  TAKE THE TIME TO LINE UP THESE POINTS - IT WILL MAKE THE NEXT STEPS COME OUT MUCH BETTER!

 
15.  Here is the fabric all pinned - a twisted tube - but that's how it's supposed to look!  No worries!

 
16.  Sew along the pinned edge, right at your 1/4" marked line.  Twist fabric to lay flat as you sew. 

 
17.  Press the seam open.  I find it helps to use a  Dritz Collapsible Sleeve Board.  It's like a mini-ironing board, and makes it much easier to slide the fabric over.


18.  Once the seam is pressed, you are ready to cut your strip!  Start where the fabric overlaps.
I find it helpful to keep the tube on the sleeve board so that I don't accidentally cut into the tube somewhere else!  Keep cutting and turning fabric.  When you get to a sewn seam, just cut right over and follow your measured width line.
 

After a LOT of cutting, you will end up with a pile of bias strip! 

 
19. To turn it into bias tape, pull out your bias tape maker - that little triangle with a handle.  Insert one end of the fabric into the wide end, and push through.  You can use a pin or other pointy object to stick through that little slot and help feed it through until it pops out the skinny end.

 
20.  Once you have an end out, pin to one end of your ironing board.  Set your iron for whatever fabric you are using.


21.  Starting at the pinned end, run the iron over the bias strip, pulling the bias tape maker with the other hand (the little handle meant to be pulled at this point).

 
22.  Your single-fold bias tape is done!

 
23.  If you are creating double-fold bias tape, go back to the beginning of the strip and fold it in half.  Iron over this new fold. 


24.  And, if you are going to be making a ton of this bias tape for all sorts of projects, you could cave and invest in this little machine: Simplicity Bias Tape Machine.  It will create the single-fold bias tape in just a minute or two!


Ta-da!  Lovely bias tape made from cotton quilting fabric, just waiting for next week's project! 

 
Check back next Tuesday for the first bias tape project! 


LinkWithin

Related Posts Plugin for WordPress, Blogger...