Showing posts with label boy. Show all posts

Friday, May 4, 2012

Up, up and away!


We had friends over the other day and one of the boys was dismayed to not have any dress-up clothes (apart from all the dresses!).  Remembering Jill's post about a set she made for a friend, we sprung into action to remedy our dress-up stash void.

Apart from some slippery fabric that wanted to pucker, I think our superhero friend will love it - I can already imagine him flying around his yard, deflecting his older brother's lasers.

Now, can I get away with making and wearing one of my own?  Some days, I just need it! 

Wishing you a superhero kind of day!


Tuesday, April 17, 2012

Doggy love sunhat

 First off, thank you for all the lovely comments about my spring top.  I didn't win, but I honestly feel like having it be a finalist was such an honor!  There are two more weeks, so maybe my color block top will find its way into the judges favorites, or I'll get my act together and actually sew one of the MANY ideas floating around in my head. 


I also wanted to share a quick project: another Oliver + S sunhat.  This time, it is a bit more "boy" - for a little friend who turned ONE yesterday!  Happy Birthday, little man!


The party theme was dogs so I thought this print was perfect!  The blue is Robert Kaufman Whiskers and Tails "Dog Park", and the green magically coordinated (from Joann's).


I love the pop of red - I think that white dog does too - sniff sniff! 

Hope you have a tail-wagging kind of day!

Wednesday, April 6, 2011

Harry Potter in the house!

Who's that?  Could it be?


Harry Potter!  AKA my almost 9-year-old nephew, proudly showing off his Harry Potter party hat.


 O, my friend - here's wishing you the MOST magical birthday ever!


Friday, April 1, 2011

A few more...

...hats, that is.


Three new ones to add to the collection - two with ball fringe, one with extra large rick rack.


And, I couldn't resist this one.  What do you suppose she's thinking right then and there?

Have a happy day!

Tuesday, March 22, 2011

Tee Hee

Don't these make you giggle?


I saw an iron-on applique at the store the other day that gave me the idea (then I saw a blog post after I made my first two - something in the air?)


These two long sleeved ones are for two friends who are due with boys next month.  I found some great lined pants for fall, and the TINIEST O-Ball ever to go with the shirts.


I hope the moms-to-be get a chuckle out of these, too! 
  

Here's to something bringing a suprise smile to your face today! 

Wednesday, March 2, 2011

Celebrate...with party hats!


While looking at a very girly princess hat the other day, it occurred to me that I could revamp the design to make a basic party hat.  Seeing as this is Celebrate the Boy month over at Made by Rae and Made, I thought this was the perfect way to get in the spirit!

So, dig out your favorite boy fabric and celebrate your little guy by making him a cute (and super-simple) party hat!

Here's how:

Materials: one 10" x 15" rectangle of outer fabric
                  two 10" x 15" rectangles of duck cloth for interior
                  one 11" piece of 1/8" elastic
                  one 18" piece of trim (rick-rack, pom-poms, etc.)

OR
                  
                  see HERE for an alternate way to line hat, including coordinating cute fabric


Step 1: Make a quick pattern - this hat is 9" long (from point to bottom) on both sides, and about 9" along the curved bottom.  So, the top angle is 60 degrees (hello, junior high math anyone?).
I'm trying my hand at including a pattern here (forgive my superior technical skills...ha ha) - the pattern is hand-drawn, and (I'm pretty sure) upside down.  Oh well - it will save you some math, right?

Step 2: Place one 9" side along the fold of your fabric.  Cut along the other 9" side and the curved bottom.  Repeat for both pieces of duck cloth.
Note: when you open the cut pieces of fabric, they will now be triangles with 9" straight sides, an 18" curved bottom, and a 120 degree angle at the top.


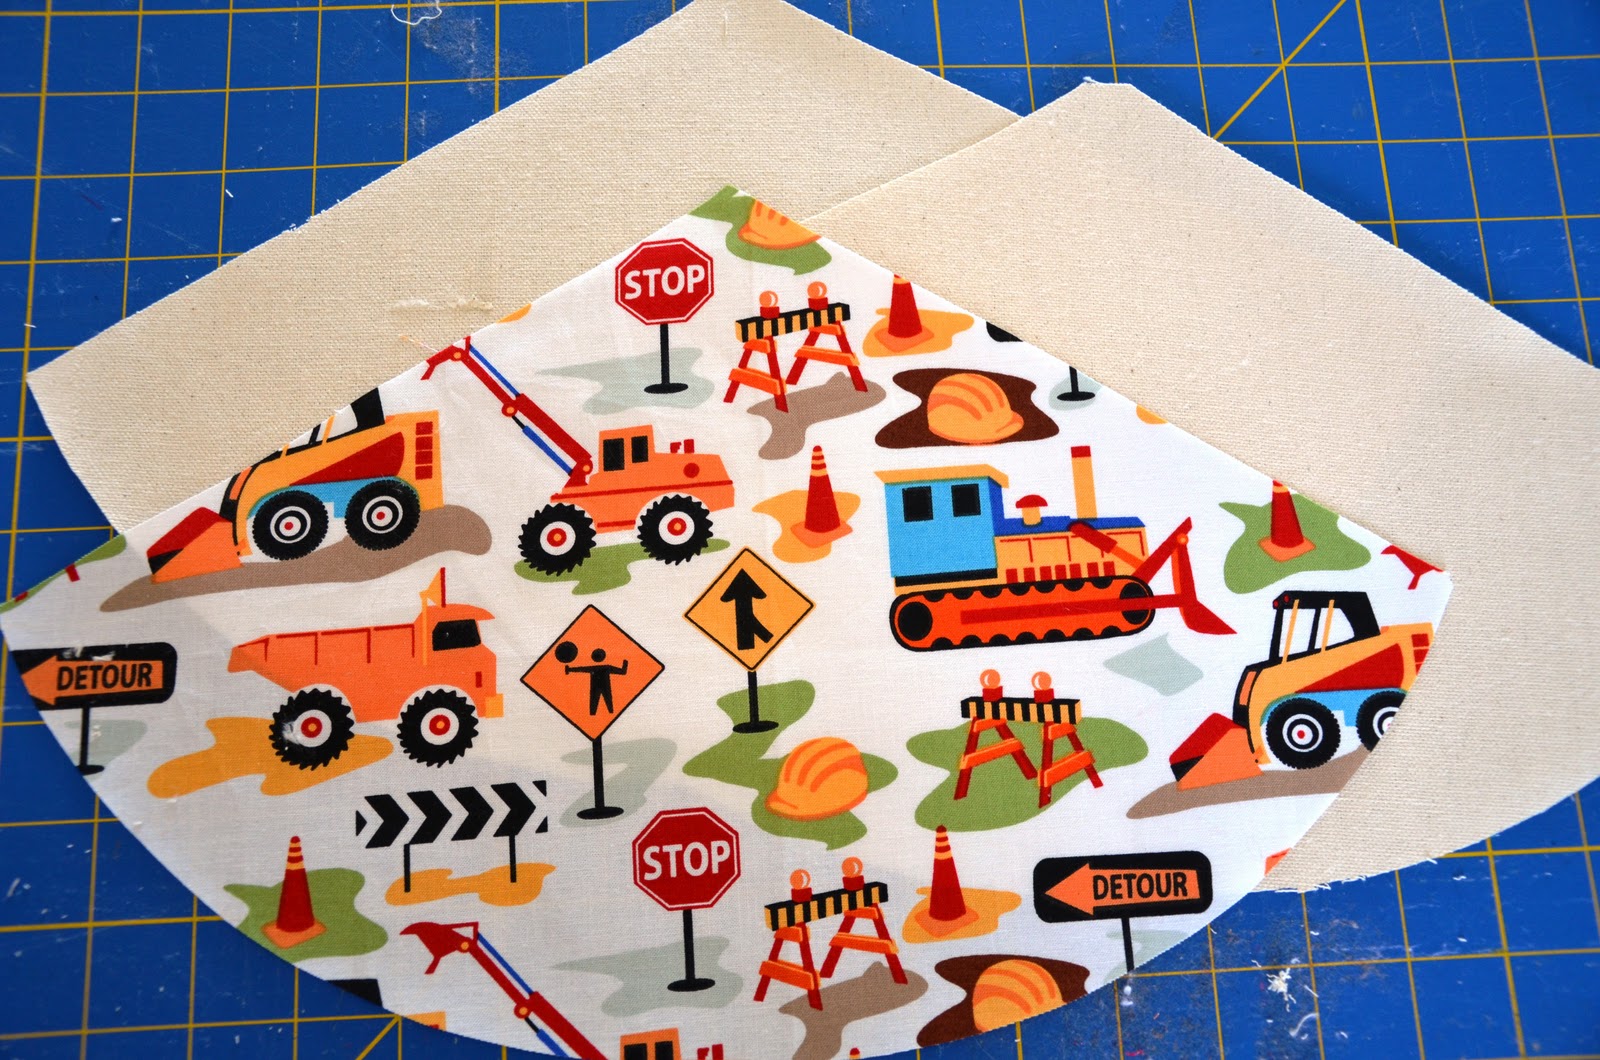
Step 3: Layer the fabric together.  Make sure the right side of your outer fabric is facing out.  I like using a temporary spray adhesive to hold the pieces together vs. pins - much quicker.


Step 4: Baste along the bottom curved edge.  I used about a 1/4" seam allowance.


Step 5: Serge (or zigzag or pink) along this edge.

Step 6: Sew down your elastic about 4 1/2 " in from each end of the bottom edge.  I zigzag and straight stitch over the elastic a few times to really secure it (do you think it looks secure?).


Step 7: Sew down your trim, covering up the elastic and serging.  Be sure to move the elastic out of the way so you don't sew it into your trim!  Trim that little bit of elastic sticking out.


Step 8: Fold the hat in half, right sides together, to match each 9" straight edge.  Sew this seam, being sure to backstitch at either end.  Serge (or otherwise finish) this seam.

Step 9: Turn the hat right side out, press and try on your little one. 


Have fun with all the fabric and trim combinations you can make!  I only had this green rick rack on hand when I made these three, but later that day, I raided the trim aisle at Joann's for lots more options.
I also think this would be such a fun project to make with muslin as the outer fabric.  Then, give the kids fabric markers, etc. and let them decorate their own!

Have fun!


LinkWithin

Related Posts Plugin for WordPress, Blogger...