
Caroline from Sew Can She recently asked me to guest post on her blog. I got to pick whichever tutorial I wanted to try out and then post about it. What follows is what will be posted on her blog:
Hello, Sew Can She readers! I'm popping over from my blog, Jane of All Trades, to share my latest project - the Retro Travel Bag from Melissa Mortensen.
Before Caroline asked me to guest post, I had bookmarked this bag as a must-do. Melissa's choice of fabric and color combinations is adorable! I'm a girl who likes a challenge, and a new bag!
Here's Melissa's version:

For fall, I wanted something a little different. I remembered I had a red tweed-ish fabric (intended for a skirt years ago, but never made it out of the stash) that I thought would be cute for the autumnal version of Melissa's bag.
Here's my version:

It ends up being much bigger than I had expected, but definitely a travel bag. (For measurement's sake, I fit 6 rolled up beach towels in it!) Now I'm even more excited for an upcoming get-away weekend with Mr. Jane of All Trades!
In retrospect, I wish I had either used a brown tone for the bias/lining/piping/handles, or a softer gray color. The black is just a bit too much of a contrast. I didn't realize until I started working closely with the fabric that it has a bit of a rust color in the weave. Oh well. Hopefully I'm the only one looking that closely!
As for the pattern itself, she is correct in stating that this is an intermediate/advanced pattern. To pace yourself, I suggest cutting all fabric and interfacing one night, sewing exterior another night, and sewing interior and putting it all together a third night.
Also, I realized there were no seam allowances included! I did my best to guess based on what I was sewing (piping, bias tape, zipper) and it, luckily, all matched up.
For the piping around the outer edge, I started by folding down about a half inch, as show below, and sewing this down.

At the end of the piping, I overlapped the end with the previously-folded part and sewed over, as shown below.
Hello, Sew Can She readers! I'm popping over from my blog, Jane of All Trades, to share my latest project - the Retro Travel Bag from Melissa Mortensen.
Before Caroline asked me to guest post, I had bookmarked this bag as a must-do. Melissa's choice of fabric and color combinations is adorable! I'm a girl who likes a challenge, and a new bag!
Here's Melissa's version:
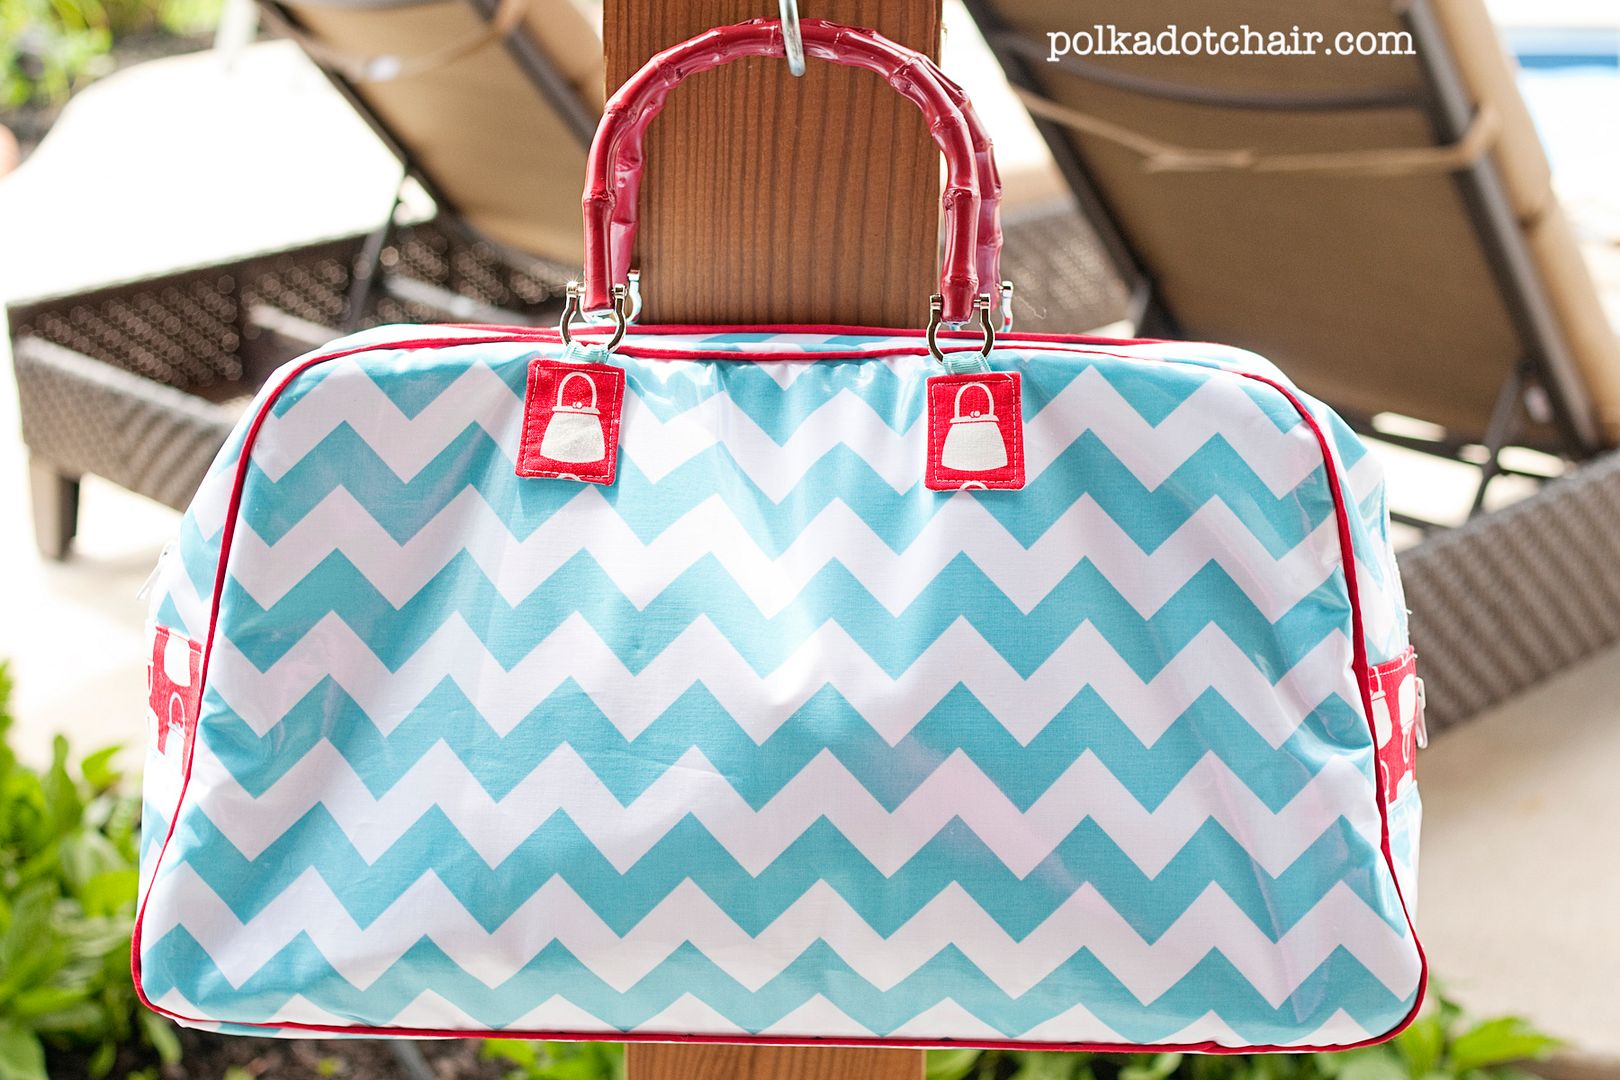
For fall, I wanted something a little different. I remembered I had a red tweed-ish fabric (intended for a skirt years ago, but never made it out of the stash) that I thought would be cute for the autumnal version of Melissa's bag.
Here's my version:

It ends up being much bigger than I had expected, but definitely a travel bag. (For measurement's sake, I fit 6 rolled up beach towels in it!) Now I'm even more excited for an upcoming get-away weekend with Mr. Jane of All Trades!
In retrospect, I wish I had either used a brown tone for the bias/lining/piping/handles, or a softer gray color. The black is just a bit too much of a contrast. I didn't realize until I started working closely with the fabric that it has a bit of a rust color in the weave. Oh well. Hopefully I'm the only one looking that closely!
As for the pattern itself, she is correct in stating that this is an intermediate/advanced pattern. To pace yourself, I suggest cutting all fabric and interfacing one night, sewing exterior another night, and sewing interior and putting it all together a third night.
Also, I realized there were no seam allowances included! I did my best to guess based on what I was sewing (piping, bias tape, zipper) and it, luckily, all matched up.
For the piping around the outer edge, I started by folding down about a half inch, as show below, and sewing this down.

At the end of the piping, I overlapped the end with the previously-folded part and sewed over, as shown below.

Then snip the ends within the seam allowance, as shown below.

The result is a nice, almost-seamless joining of piping. I suggest doing this at the bottom so it is less noticeable.

Another minor change was in making the handle tabs. The pattern has you sew the pieces, turn right side out and then fold in a 1/4". Maybe I'm just not good at this, but I highly prefer pressing the 1/4" first (wrong sides together), and then sewing right sides together and turning.

I didn't have the required length for the Timtex/Peltex bottom so grafted two pieces together. I think it works better to overlap the two pieces by a fair amount (about 4" here). This ensures that the bottom stays rigid, despite the two pieces. I simply zigzagged over the edge to attach.

Here's a peek at the inside of the bag - a lined pocket edged with bias tape. This would definitely be big enough to store toiletries tall and wide (hairbrush, hairspray) as well as wallet, phone, etc.

If I were to make this bag again, I would love to try a gray tweed/wool (a leather piping would be super chic). I also think an exterior pocket would be easy to add (just follow the directions for the interior pocket but attach to one exterior piece before adding piping) and perfect for sliding your travel literature - magazines, books, print-outs of directions or coupons!
Thanks, Caroline, for asking me to guest post. If it weren't for this opportunity, I probably would have just admired Melissa's bag instead of jumping in and making one for myself!


