Showing posts with label bag. Show all posts

Sunday, February 2, 2014

Just in time for Valentine's Day: easy freezer stencil totes kids' craft

 
First off, hello!  Long time no blog! 
 
Secondly, it's almost Valentine's Day!  Are you getting ready to celebrate? 
 
The girls and I created these easy freezer stencil bags for their teachers (if J.Z. is reading this, spoiler alert!).  It was fun to get back to some crafting and be able to do it with little E and A.
 
 
Disclaimer: this bag is pretty much a knock-off of one I have from Old Navy.  I LOVE it and thought the teachers would find it handy and cute.  We found a 3 pack of medium totes at Joann's and some Tulip Soft Matte fabric paint.  Oddly, the pink and yellow were sparkly, but you cannot tell from the outside!  A roll of freezer paper from the local grocery store and we were good to go.
 
 
Little E dabbing on the yellow.  We found these thick, strong brushes were best to really get the paint in all the grooves of the canvas.
 
 
Little A's hand moving at super speed!
 
 
This one is done and drying...
 
 
...and the big reveal.  It was really cute to watch the look on the girls' eyes as they peeled back the paper.  I love how the "messy" heart turns into clean lines. 
 
 
Here are three of the six we made.  With four paint colors, we managed to make all six different.  This was the perfect project for the little ones - they could be messy and inexact, and it didn't take too long to dry so their interest was maintained.  I loved that they thought of their teachers as they picked colors, reasoning who would like which combinations.
 
We are blessed with wonderful teachers and we hope we make them feel special this Valentine's Day with our gifts.


Friday, December 21, 2012

Zip pouch from Zaaberry


Little E is in her first ballet performance this weekend.  She has a list of things to bring, including make-up (!) and extra hair supplies.  What better excuse to try out Zaaberry's Zip Pouch tutorial!?


I found these laminated cotton remnants at Stitch Lounge for $1.50 each - more than enough to make a pouch.  And, the zippers were on clearance too!


I had the lining fabric in my stash - a pretty good match - and a great way to use up an old scrap.
 
The best part is that this zip pouch is large enough to hold all Little E's supplies without being overly big.  And...it was a quick and easy project - I was able to get it done while the girls were having "quiet time" (I put that in quotes because it was neither quiet, or much time).

Thanks, Ruby, for a great tutorial!


Tuesday, November 6, 2012

Make your own piping tutorial


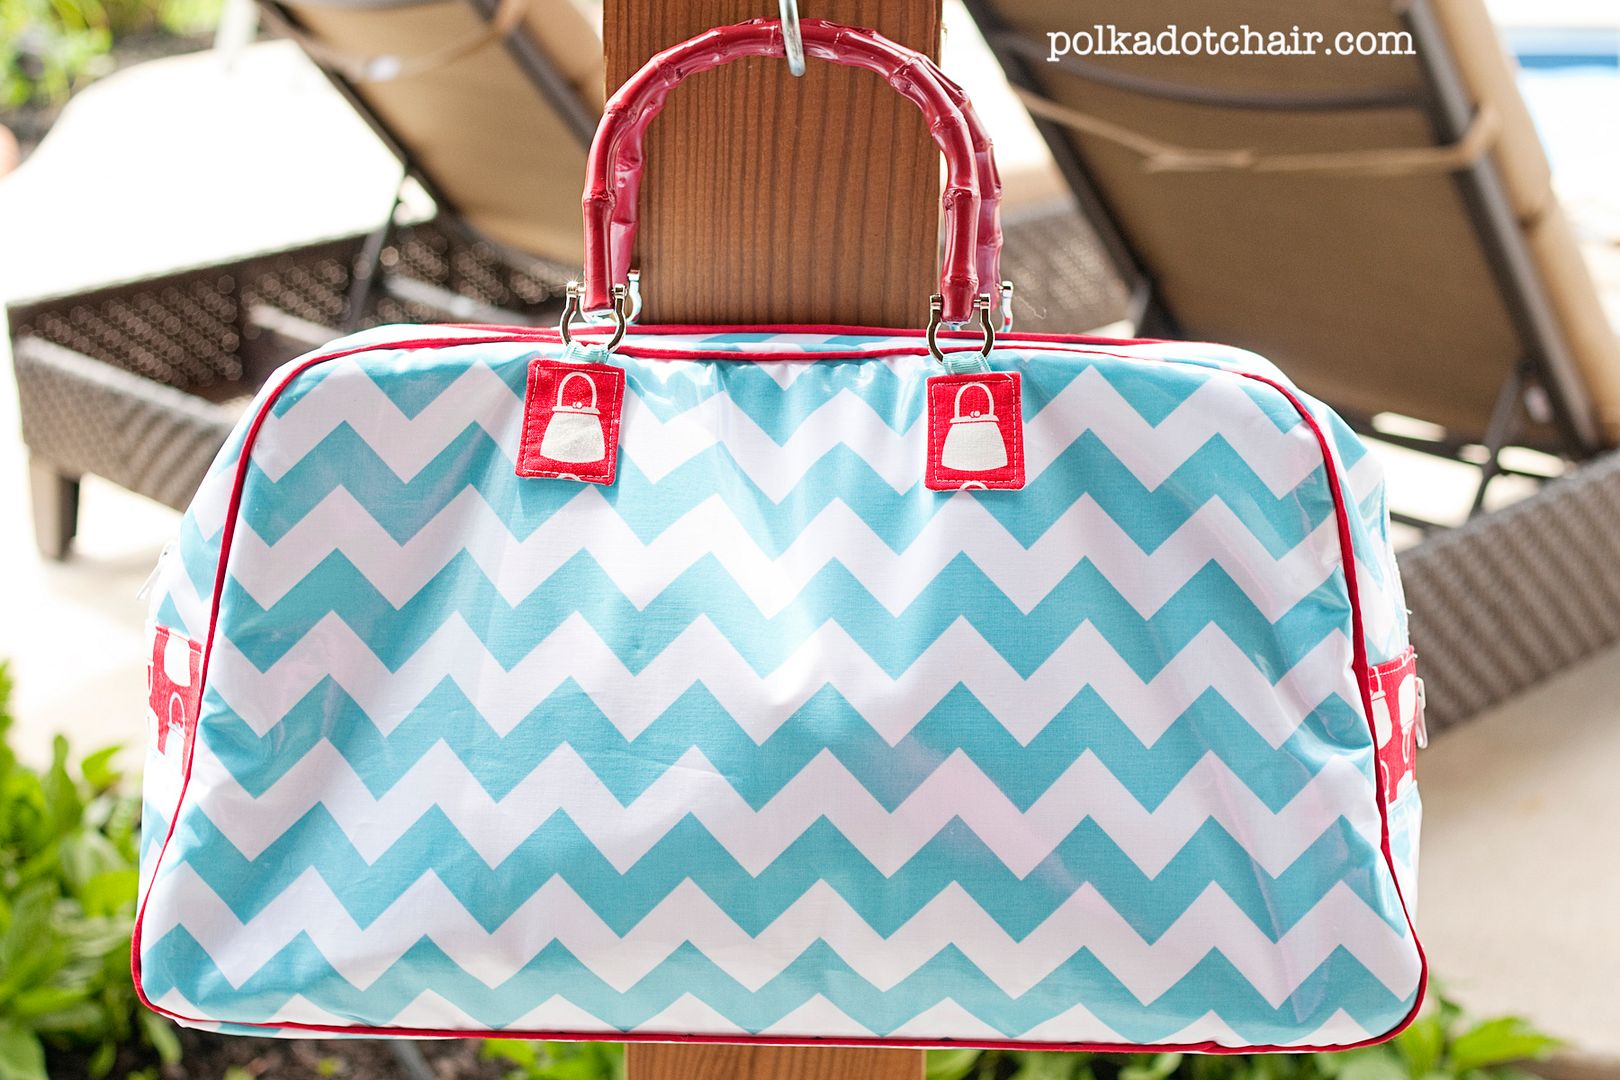
For this week's Bias Tape Tuesday, I want to show you how easy it is to turn your homemade bias tape into piping.  Piping is such a great way to make your projects pop with a little extra detail - why not be able to use the perfect fabric?  And...there are lots of times you will want to use matching piping and bias tape (like the Retro Travel Bag).  Don't limit yourself to store-bought bias and piping!  Read on and learn to make your own!


Here's the perfect example of store-bought vs. homemade.

I pulled out this owl corduroy for a new project.  I put the store-bought bias tape up against it - the color is good, but the material doesn't match, it is a bit shiny, and the texture is flat.


Now, here's my homemade bias: textured corduroy, cute print with matching colors to accent owl print, and not shiny (I think the sheen looks weird with soft corduroy!).   MUCH better than the store-bought stuff.  But...this pattern calls for piping too, so, rather than sacrifice that cute bias, I'll just make my own piping with the polka dot corduroy.  Easy peasy.


Start by making bias strips (see tutorial here).  For how wide to make it, I looked this up.  The suggested formula was actually too small, so I had to remake.  For reference, my cording was 5/32".  I made the bias strip 1 1/2" wide.  This worked very well.

Once you make your strip, fold in half (no need to press) and place cording in fold.  Make sure to leave a bit of the cording sticking out. 


Hold the folded bias in one hand like a taco, and pin with the other.  Pin right up next to the cording to make it taut.  Continue folding, pinching and pinning all the way down.  (A little tip: make sure your pins follow the direction you plan to sew - makes it much easier to pull out!)


At each end, pin the cording to the fabric (it would stink to do all this work and then have the cording slip out!).


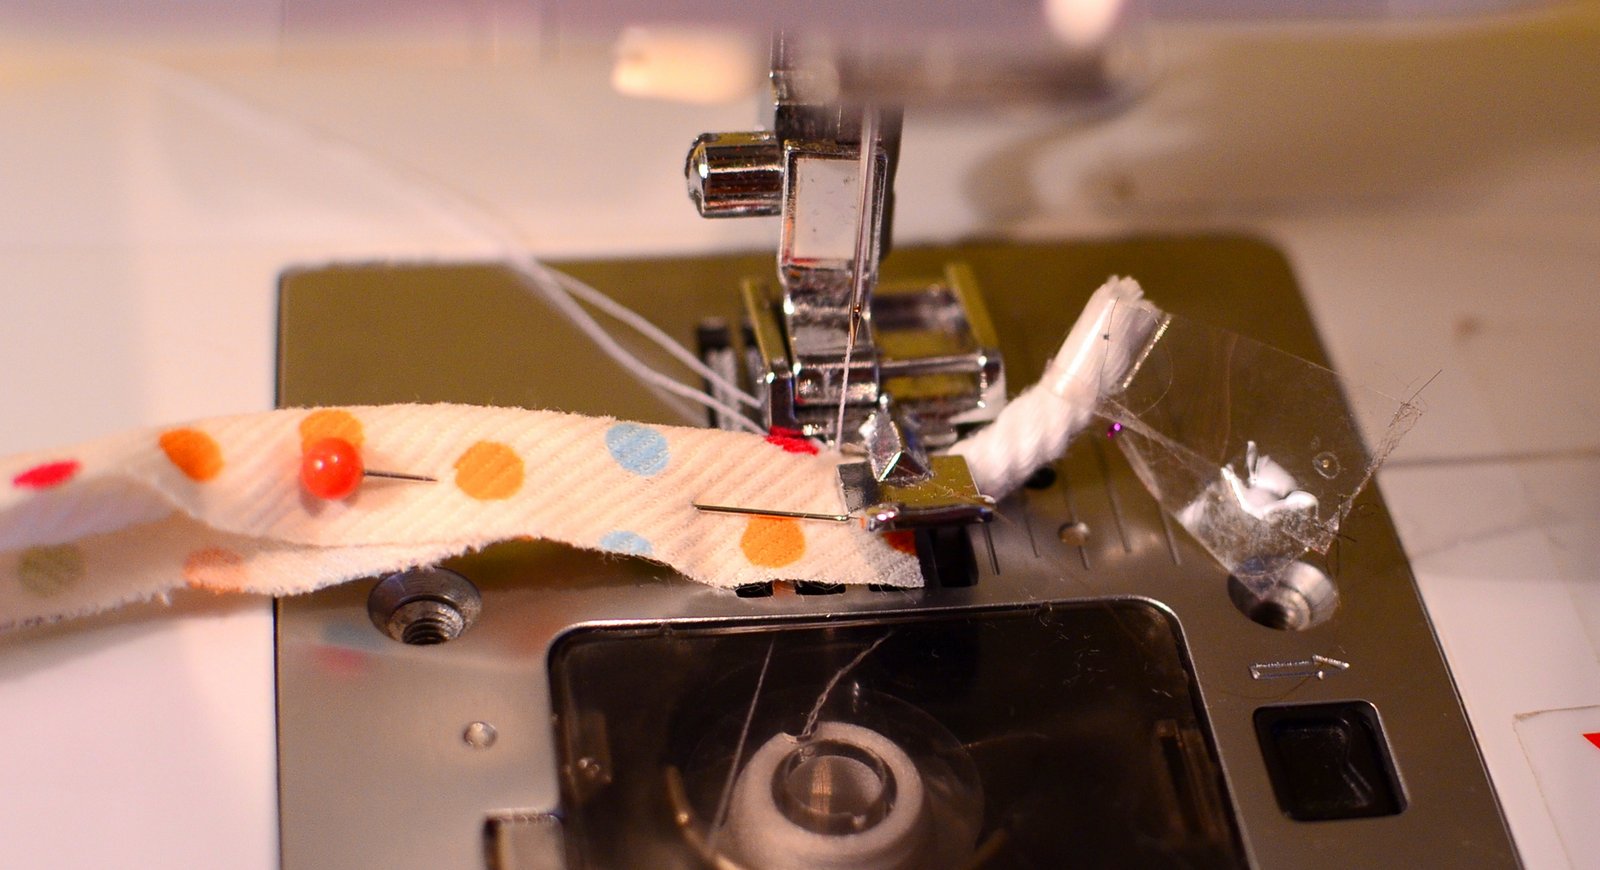
With your zipper foot, start by stitching across the end to secure the cording to the fabric. 


Then, turn and sew down the length of the piping, keeping your needle right up against the cording.  Make sure the raw edges match up - the more you pin, the easier this will be - the piping tends to roll a bit, making the raw edges come unmatched.


Stitch across the other end to secure and you are done!  Lovely, homemade piping perfectly matching your homemade bias.


Now, go use it in a cute new project!  (What could that be?  Stay tuned for more information and a giveaway!)


Tuesday, October 30, 2012

In retrospect...a pattern review

Caroline from Sew Can She recently asked me to guest post on her blog.  I got to pick whichever tutorial I wanted to try out and then post about it.  What follows is what will be posted on her blog:

Hello, Sew Can She readers!  I'm popping over from my blog, Jane of All Trades, to share my latest project - the Retro Travel Bag from Melissa Mortensen.

Before Caroline asked me to guest post, I had bookmarked this bag as a must-do.  Melissa's choice of fabric and color combinations is adorable!  I'm a girl who likes a challenge, and a new bag!

Here's Melissa's version:


For fall, I wanted something a little different.  I remembered I had a red tweed-ish fabric (intended for a skirt years ago, but never made it out of the stash) that I thought would be cute for the autumnal version of Melissa's bag. 

Here's my version: 


It ends up being much bigger than I had expected, but definitely a travel bag.  (For measurement's sake, I fit 6 rolled up beach towels in it!)  Now I'm even more excited for an upcoming get-away weekend with Mr. Jane of All Trades!

In retrospect, I wish I had either used a brown tone for the bias/lining/piping/handles, or a softer gray color.  The black is just a bit too much of a contrast.  I didn't realize until I started working closely with the fabric that it has a bit of a rust color in the weave.  Oh well.   Hopefully I'm the only one looking that closely!

As for the pattern itself, she is correct in stating that this is an intermediate/advanced pattern.  To pace yourself, I suggest cutting all fabric and interfacing one night, sewing exterior another night, and sewing interior and putting it all together a third night.

Also, I realized there were no seam allowances included!  I did my best to guess based on what I was sewing (piping, bias tape, zipper) and it, luckily, all matched up.

For the piping around the outer edge, I started by folding down about a half inch, as show below, and sewing this down.


At the end of the piping, I overlapped the end with the previously-folded part and sewed over, as shown below. 


Then snip the ends within the seam allowance, as shown below. 


The result is a nice, almost-seamless joining of piping.  I suggest doing this at the bottom so it is less noticeable. 


Another minor change was in making the handle tabs.  The pattern has you sew the pieces, turn right side out and then fold in a 1/4".  Maybe I'm just not good at this, but I highly prefer pressing the 1/4" first (wrong sides together), and then sewing right sides together and turning. 


I didn't have the required length for the Timtex/Peltex bottom so grafted two pieces together.  I think it works better to overlap the two pieces by a fair amount (about 4" here).  This ensures that the bottom stays rigid, despite the two pieces.  I simply zigzagged over the edge to attach. 
 
 Here's a peek at the inside of the bag - a lined pocket edged with bias tape.  This would definitely be big enough to store toiletries tall and wide (hairbrush, hairspray) as well as wallet, phone, etc. 


If I were to make this bag again, I would love to try a gray tweed/wool (a leather piping would be super chic).  I also think an exterior pocket would be easy to add (just follow the directions for the interior pocket but attach to one exterior piece before adding piping) and perfect for sliding your travel literature - magazines, books, print-outs of directions or coupons! 

Thanks, Caroline, for asking me to guest post. If it weren't for this opportunity, I probably would have just admired Melissa's bag instead of jumping in and making one for myself! 
 

Thursday, September 20, 2012

Long time no post

 
While absent from posting, I have been busy behind the scenes.  Since the summer, I have been developing patterns for and teaching sewing classes at Beehive Sewing Studio and Workspace.  It's an amazing drop-in studio developed and run by one very talented lady (you go, T!).

It has been such an exciting endeavor for me - combining my professional (teacher, pre-kids) and crafty lives.  It has been a good challenge to think of projects that are appropriate for a workshop format, and then writing up directions to support beginning sewists.

If you are a local reader, be sure to check out Beehive Sewing - there are all sorts of classes, both project-based and technique-based, for every level of sewist.  And, the new Halloween calendar is up!  I'll be sharing an adorable trick-or-treat bag perfect for your little one's loot, as well as an appliqued bunting for your Halloween decoration stash.

Last but not least, stay tuned for an AWESOME giveaway coming up at the beginning of October. 

Hope you are finding new creative outlets this fall!

P.S. In the midst of all the sewing classes and back-to-school frenzy, somebody in our house turned 3!  I'll be posting photos and a new tutorial soon!  

Friday, August 24, 2012

Nautical Adventures Tote Tutorial

This summer, we bought a new boat.  We have been enjoying dinner cruises after work, weekend island camping and now a week on beautiful Lake George.  Along with the new boat came new ideas for sewing - one of which was this Nautical Adventures Tote - a simple, catch-all tote to gather all our bulky items and carry them onto the boat.
This is a great beginner project - there are only eight straight seams to sew, but you will end up with a polished, sporty tote...
...with nautical-esque grommets...
...neatly-boxed corners...

...and a contrasting binding to finish off interior seams.
Ready to try?
You'll need
  • one 24" x 44" piece of home dec./canvas fabric
  • 4 extra large grommets and setting tool
  • 6 feet rope (make sure the width is smaller than grommet width)
  • one package contrasting 1/2" extra wide double fold bias tape
 

Fold the fabric in half along the 44" measurement, right sides together (so that the fabric now is 24" x 22").  Sew down each side with a 3/8" seam (or just less than 1/2").

 
Take one end of your bias tape and unfold it.
 
Fold the end in about a 1/4".
 
Refold the bias tape along the fold lines - see how the end is now enclosed?
 
Now take the bias tape and sandwich your side seam inside it - make sure the folded end is lined up with the fold of the fabric.
 
Pin in place.
 
Just about 3" from the top of the fabric, cut the bias tape.  You do not need to fold this end because it will be enclosed in the top seam.  Cutting here will reduce bulk when you sew the top seam later on.
 
If you can, set your stitch width slightly smaller than regular (see what my machine looks like?).  This will move the needle over to the left and help you sew right up against the bias edge.
 
Sew down the bias tape.  You will be sewing through all layers - bias tape, bag, bias tape - in one seam here. (Look carefully and you'll see my needle - usually lined up with that little gap in the presser foot, but now moved to the left to get right up close to that bias edge.)  Repeat for other side seam.
 
Now you are going to box the corner.  This takes the flat tote body and turns it into a bag with a flat bottom.  There are two ways to do this, and I actually usually prefer the other method if I am going to line a bag.  Because this is a beginner project and we want the seams intact, we'll do it this way.  Hard to photograph - easy to do! 
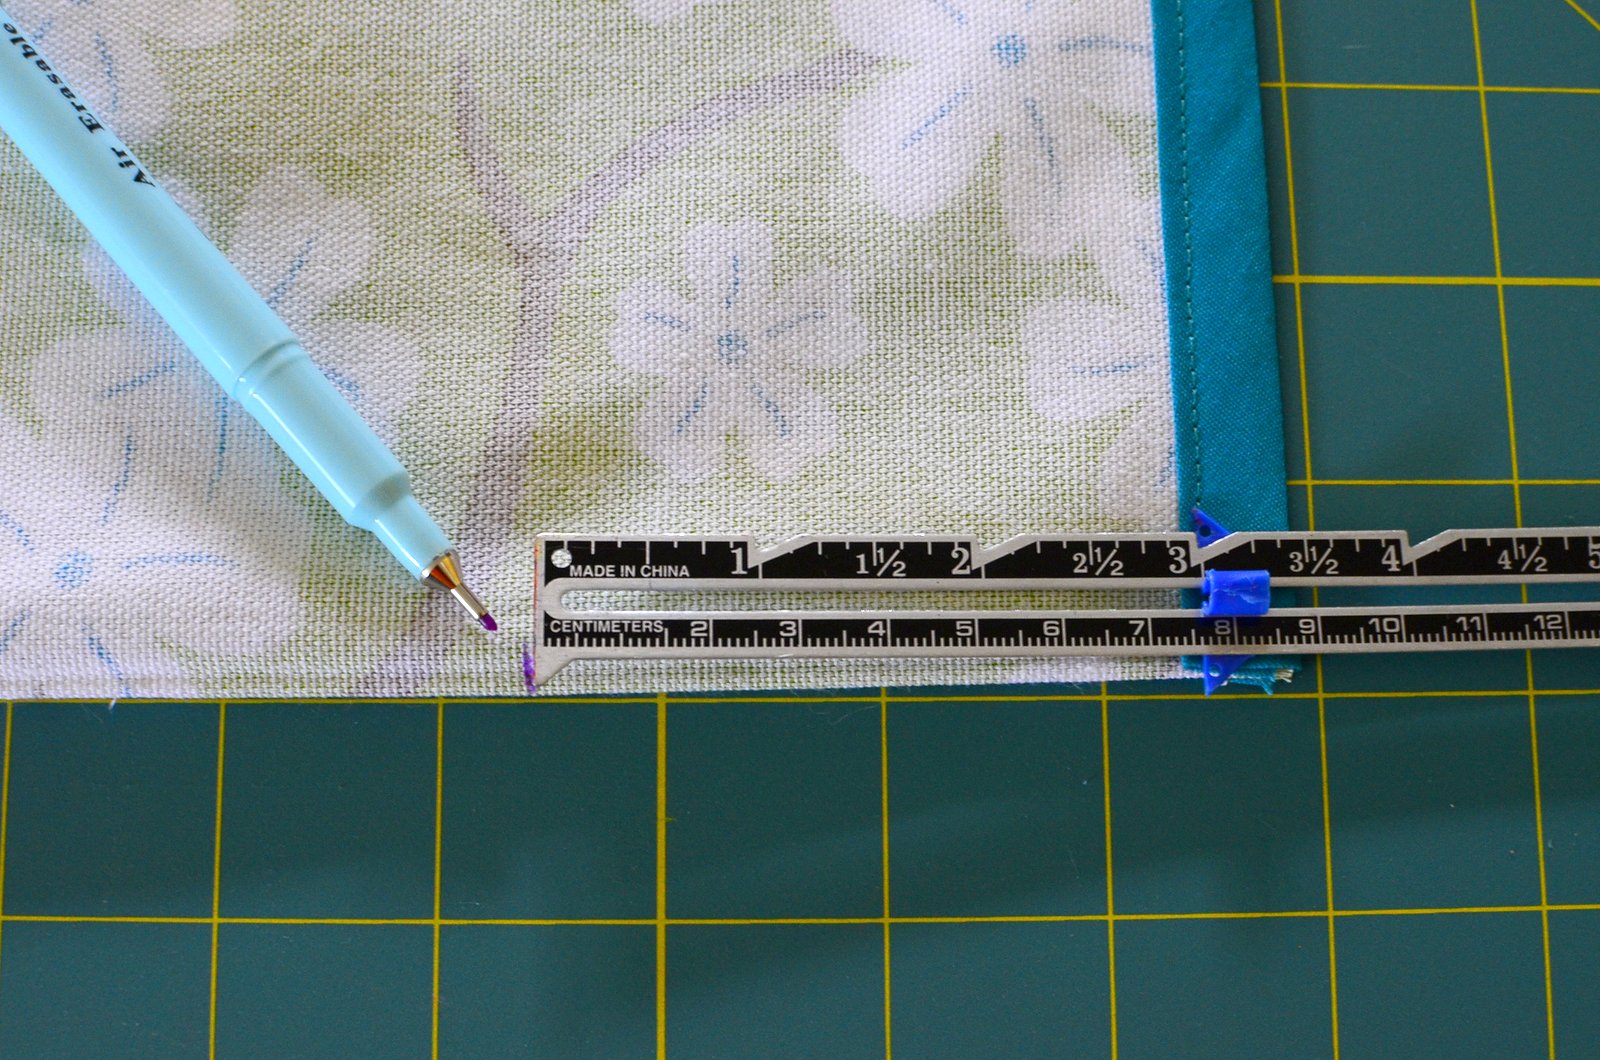
Mark 3" from side seam...
 
...and 3" from the bottom fold.
 
You are going to pinch the corner so that those two marks match up.  When you do, make sure the side seam lines up neatly with the bottom fold (do this by peeking inside the bag).  Flatten out each side and pin in place.
 
Mark a line across the corner at the 3" mark, making sure the line is at a right angle to the seam.
 
Sew this line, making sure to backstitch/lockstitch at either end.  Repeat for other corner. 
 
Now for the top edge.  Fold over 1 1/2" from the top, and press in place all the way around the top.
 
When you get to the side seams, make sure to lay them flat and then fold the top over - much less bulk this way.
 
Fold over the top 1 1/2" again and press.  This enclosed the raw edge of the fabric top (and should cover the side bias tape edge, too).
 
Pin in place all the way around the top...
...and pin on each side of the side seams to hold in place.
Sew around the top with a 1/2" seam from the top of the bag (sorry for the blurry photo!).  Then, sew another seam 1/2" from the bottom edge of the top (or 1" from the top).
Turn your bag right side out and it will look something like this!
Now for the handles.  Find the center of the front and back of the bag (you can measure or simply fold in half, matching side seams).  From that center mark, measure 5 3/4" to each side and mark.  This will be where you insert your grommets.
Follow the directions on the grommet package to insert grommets at your 5 3/4" marks.
Insert one end of the rope and tie a sturdy knot.  You may need to melt the ends if you rope is not 100% cotton - some polyester is more slippery than others!  Insert the other end into the other grommet on the same side.  I like my handles long for this type of bag, but try it on and see what length feels good to you at this point.  Tie the second knot accordingly.  Repeat for other side of bag, matching up handle length.
That's it! 

Now, pack up that bag and head out on a last-hurrah-before-school-starts kind of adventure!


LinkWithin

Related Posts Plugin for WordPress, Blogger...