Showing posts with label make your own piping. Show all posts

Sunday, October 27, 2013

Custom Halloween Pillows


A while back, I fell in love with this pillow.  It was on my list of Halloween crafts, but I just hadn't found the right template for my oversize couch pillows (remember them from this?). 


Flash forward a few weeks, and I found the above skeleton sketch in the trash!  Little E had drawn it to carve on her pumpkin, but didn't like it after all.  I pulled it out, enlarged it on the copier and turned it into a felt applique for the pillow cover.  Instead of a blanket stitch, I made coordinating felt piping (see here for the how-to).  I didn't have to worry about cutting on the bias because the felt is stretchy enough with the straight cut.  I basically followed these directions to make the pillow. 


With one pillow done, I was inspired to cover the other two in the same fashion.  Little E supplied the ghost.  Little A was more hesitant to draw on demand, so I found one of her drawings of a happy face and turned the hair into a stem.  Can you keep a straight face when you look at him?

 
I'm so excited to have festive, custom pillow covers for the Halloween season.  They are even more special because they are based on my girls' art work.  I know we'll have fun pulling them out every year and remembering their 4 and almost 7 year old versions of these Halloween classics. 


Tuesday, November 6, 2012

Make your own piping tutorial


For this week's Bias Tape Tuesday, I want to show you how easy it is to turn your homemade bias tape into piping.  Piping is such a great way to make your projects pop with a little extra detail - why not be able to use the perfect fabric?  And...there are lots of times you will want to use matching piping and bias tape (like the Retro Travel Bag).  Don't limit yourself to store-bought bias and piping!  Read on and learn to make your own!


Here's the perfect example of store-bought vs. homemade.

I pulled out this owl corduroy for a new project.  I put the store-bought bias tape up against it - the color is good, but the material doesn't match, it is a bit shiny, and the texture is flat.


Now, here's my homemade bias: textured corduroy, cute print with matching colors to accent owl print, and not shiny (I think the sheen looks weird with soft corduroy!).   MUCH better than the store-bought stuff.  But...this pattern calls for piping too, so, rather than sacrifice that cute bias, I'll just make my own piping with the polka dot corduroy.  Easy peasy.


Start by making bias strips (see tutorial here).  For how wide to make it, I looked this up.  The suggested formula was actually too small, so I had to remake.  For reference, my cording was 5/32".  I made the bias strip 1 1/2" wide.  This worked very well.

Once you make your strip, fold in half (no need to press) and place cording in fold.  Make sure to leave a bit of the cording sticking out. 


Hold the folded bias in one hand like a taco, and pin with the other.  Pin right up next to the cording to make it taut.  Continue folding, pinching and pinning all the way down.  (A little tip: make sure your pins follow the direction you plan to sew - makes it much easier to pull out!)


At each end, pin the cording to the fabric (it would stink to do all this work and then have the cording slip out!).


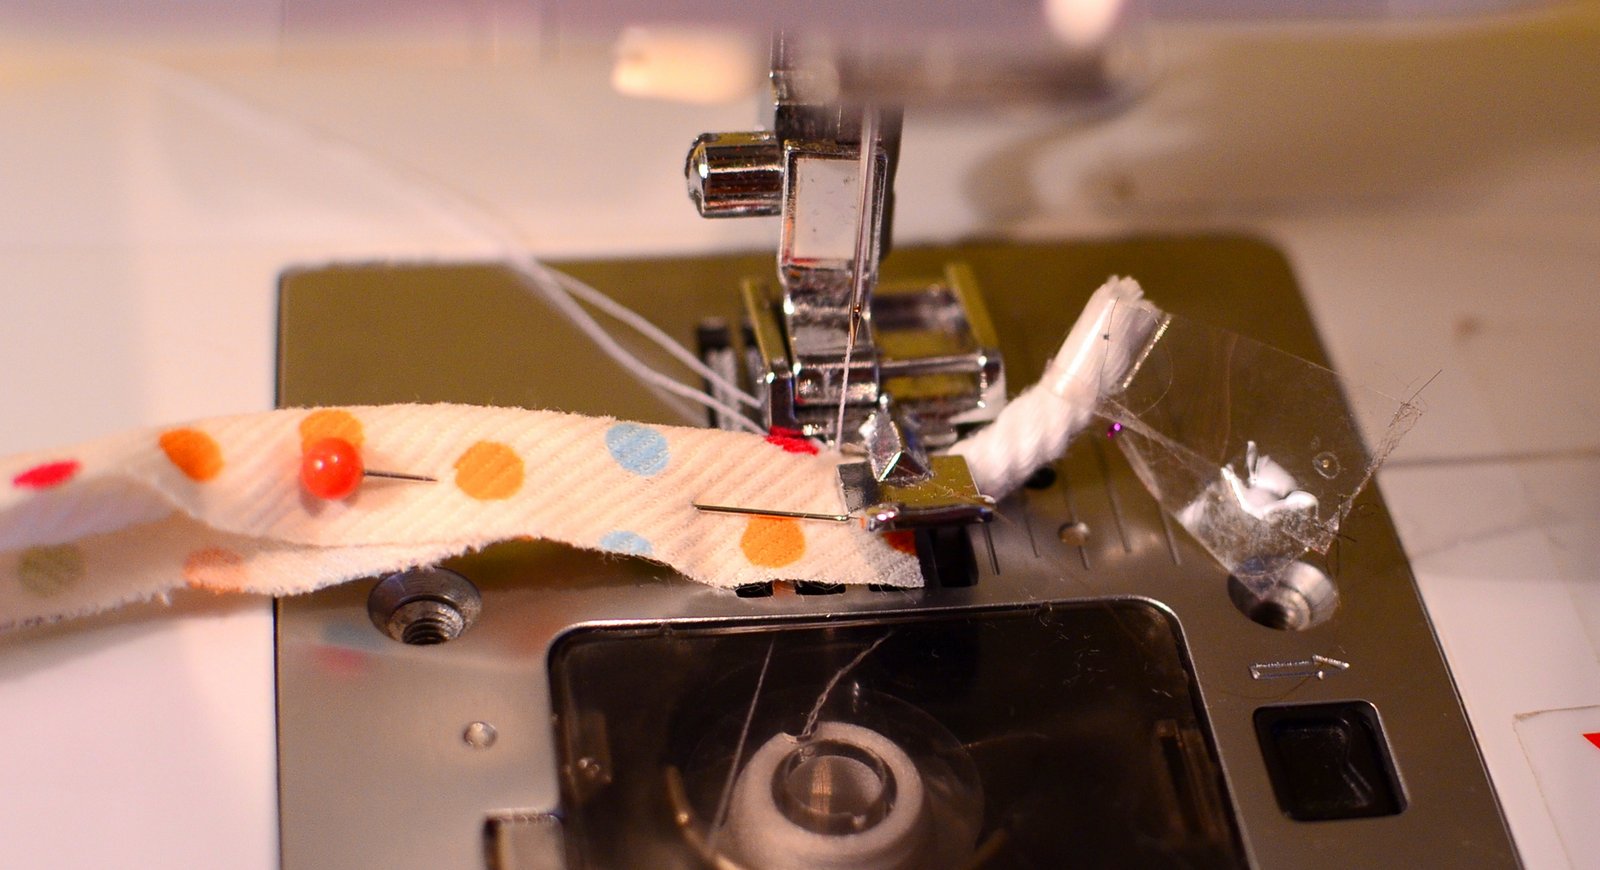
With your zipper foot, start by stitching across the end to secure the cording to the fabric. 


Then, turn and sew down the length of the piping, keeping your needle right up against the cording.  Make sure the raw edges match up - the more you pin, the easier this will be - the piping tends to roll a bit, making the raw edges come unmatched.


Stitch across the other end to secure and you are done!  Lovely, homemade piping perfectly matching your homemade bias.


Now, go use it in a cute new project!  (What could that be?  Stay tuned for more information and a giveaway!)


LinkWithin

Related Posts Plugin for WordPress, Blogger...