Showing posts with label reusable. Show all posts

Thursday, January 10, 2013

Teeny tiny snack sacks tutorial


I will warn you: these are a little addictive to make (maybe because I keep using food-related fabric?).
If you are up for the temptation, you will need:


one 10.5" x 3.5" piece of ripstop nylon (or liner of your choice)
one 10.5" x 3.5" piece of cotton fabric
one 2" piece of velcro (poky and soft sides)


Sew the soft velcro in the center of one end of the nylon, positioned 3/4" down from edge.


Fuse wrong side of fabric to wrong side of nylon.
**If using a directional print, turn it upside down and keep velcro at top.**


Here it is fused with velcro on the inside.


Round top corners.


Finish opposite short end (serge or zigzag or bias tape, as in this tutorial).  Sew poky velcro 1" down from finished edge and centered on the fabric.


Fold bottom edge up 3.5".  Finger press fold.  If you have a craft label, sew on now.


Starting at the bottom corner, serge (or otherwise finish) around the snack sack, ending at the other bottom corner.  Fray check ends of stitching.
  
 Pack some cookies and enjoy your new teeny tiny snack sack!


Tuesday, October 16, 2012

Kids' Art Smock made with reusable shopping bags: a tutorial


Last week, I gave away a handsewn oilcloth art smock
Did anybody notice all the bias tape binding on it? 
Would you like to make your own?


You can make this with any material (preferably something waterproof and wipeable).  Oilcloth can be hard to find and doesn't have a huge variety of prints (that I can find).  Laminated cotton is just super expensive for a project that is going to be used for kid's art!  So...I opted for those cute, cheap shopping bags they now seem to sell everywhere!

This smock has a pocket with spaces for all your "arting" materials.


For this project you will need:
one patterned reusable shopping bag
5 yards 1/4" wide double-fold bias tape (make your own following this tutorial!)


Step 1: cut off the sides of the bag


Step 2: cut the top and handles off the bag


Step 3: fold the bag, right sides together


Step 4: trace and cut out one front, one back and one pocket piece
(pattern here)
To print pattern, select "actual size" and "poster" to tile pages.  Overlap at least .5".


Step 5: sew binding to top of pocket (see here for how to)

Step 6: pin and then baste pocket onto front of smock
mark the pocket binding in fourths  (hard to see my pins in the photo!)
and sew straight down, making sure to backstitch at the top edge


This is the back side of the front - you can see the stitching much better - basting around the edge, and three sewn lines to create four pockets


Step 7: sew binding around back opening


Step 8: sew shoulders, making sure to backstitch at beginning and end of seam


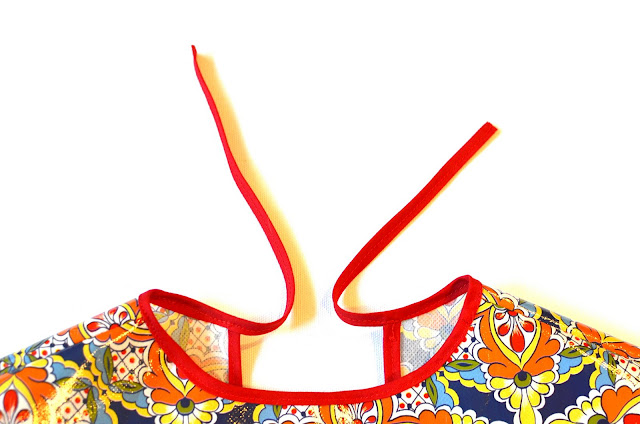
Step 9: measure 7" from one end of bias tape
at the 7" mark, pin to one side of neck


Step 10: starting at end of bias tape, stitch bias tape together and then continue past pin to sew bias tape around neckline.  Continue 7" beyond back opening edge (where bias tape overlaps).


Step 11: Cut four 10" pieces of bias and sew along each long end
knot one end of each tie
sew to smock about 3" above pocket binding on front left and right
sew to smock back, matching placement from front ties

Step 12: starting at the bottom center back, sew bias tape around bottom, up side, around armhole, down front side, across front bottom, up other front side, around other armhole, down back side and finishing at starting point (see here for how to finish).  As you sew, make sure you encase the ends of the four ties.

It should look like this when done! 


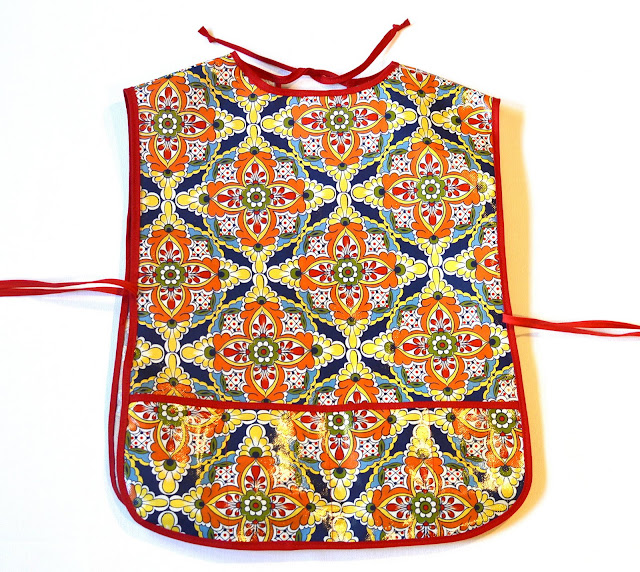
 Now, try it on your little ones and see what they choose to create! 


Wednesday, August 29, 2012

Super-sized snack sacks


Somebody in our house started kindergarten today! 
 

She now has to bring snack to school. 
What's a crafty momma to do but make up a super-sized snack bag?
 

Big enough to fit a few items and have it all packed neatly in one spot.  With so many new routines to learn, who needs to be fumbling for snack every day?


Of course, little sis got her own too.  Even if it was just to sit in the living room and snack!
 
Hope your little ones are as enthusiastic and excited for school as that crazy girl up there!


Thursday, February 16, 2012

Home sewing versus Target...

In preparation for an upcoming trip, I was looking for a project that would yield a large, all-purpose tote equally fitted for the airplane and the beach.  I was excited to try this bag from Liberty Book of Home Sewing


While it is very versatile, I had to draw the pattern myself, it takes a whole yard of fabric and doesn't have a zipper.

Enter Target dollar spot: for $2.50, I found this bag.  Long handles, zipper, and made from waterproof material.


How can a home sewist compete with that?!


Friday, June 10, 2011

On a roll...

Just a quick pop-in to share some projects from a while back.  I got on a roll with these infant knit hats (from Craft Hope)


 and these snack sacks. 


 Both are so quick and satisfying - especially when I finally dared to cut into my t-shirt stash!  I can't tell you how long I had been hoarding saving thrifted t-shirts but never wanted to ruin them!  As for the snack sacks, we have been using them more and more so I thought now was the time to make some of my own.  And, once you make one, why not make 27?! 

P.S. I have two tutorials coming soon - stay tuned for some fun summer projects.

Hope you are well and enjoying some summer sunshine!

LinkWithin

Related Posts Plugin for WordPress, Blogger...