After making a few for friends and the girls, I made 20 for little A's birthday! I think I have the process down, and so am here to share it with you!
You will need:
one piece of duck cloth 8" x 20"
one piece of cotton quilting weight 8" x 20"
one set of Velcro 3" long
1 yard 1/2" double-fold bias tape in coordinating color
optional (for label): 1" wide cotton twill tape
iron-on transfer paper
Step 1: Baste cotton quilting fabric to duck cloth. I'm a big fan of the basting spray!
Step 2: Baste short ends together with a 1/4" seam allowance (or less).

Step 3: Round corners on Velcro. I just found my scrapbooking corner rounder and it works on Velcro! Much easier than eyeballing and cutting with scissors.

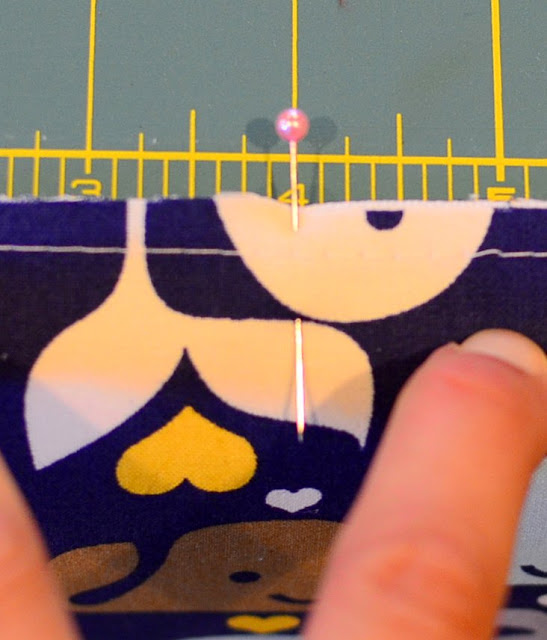
Step 4: Mark center of each short end.
Step 5: Sew pokey Velcro to front and soft Velcro to inside top. Be sure to leave at least a 1/2" from the raw edge to the top of the Velcro.
If you have a directional print, make sure it is facing UP where you sew the pokey Velcro.

Step 6: Sew bias tape across top front. Trim any bias tape sticking out on either side.

Step 7: Fold snack sack up from bottom to 8". Flap should measure 4". Press in place...

...and baste sides to above bias tape.

Step 8: Using a round object (can you tell I sew in the playroom?), trace a curve at each flap corner...

...and cut along this curve.

Step 9: Fold in end of bias tape (
like this), tuck snack sack in between bias tape, and overlap the tape about 1".

Fold the bias tape toward the back.

Step 10: Sew around the entire snack sack, stretching bias tape gently around corners. When you get close to the other bottom edge, fold in the ends of the bias tape...

...fold towards the back, and finish sewing.

Here it is!

Cut the twill tape and fold the ends under.
Sew the label onto your snack sack and you are done!
Now, be crazy like me and decide to make 20 for party favor bags!
Have fun making these and deciding how to use them (makeup, puzzles, art supplies, gift bags, etc!)


