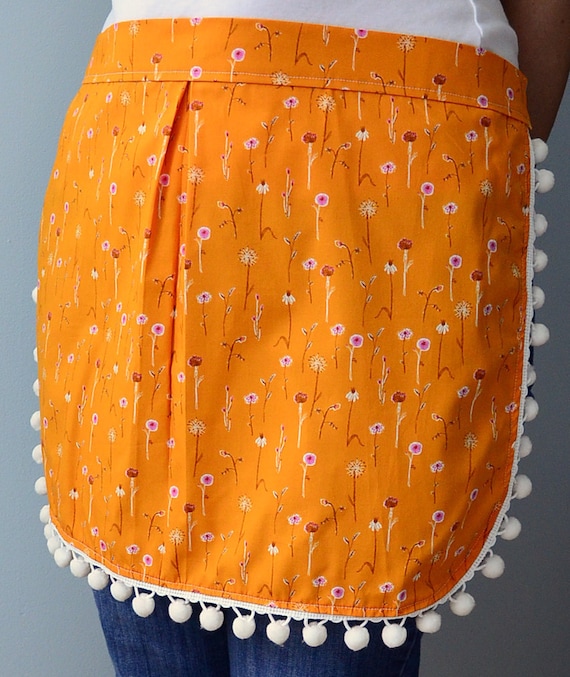
This summer, we bought a new boat. We have been enjoying dinner cruises after work, weekend island camping and now a week on beautiful Lake George. Along with the new boat came new ideas for sewing - one of which was this Nautical Adventures Tote - a simple, catch-all tote to gather all our bulky items and carry them onto the boat.
This is a great beginner project - there are only eight straight seams to sew, but you will end up with a polished, sporty tote...
...with nautical-esque grommets...
...neatly-boxed corners...
...and a contrasting binding to finish off interior seams.
Ready to try?
You'll need
Fold the fabric in half along the 44" measurement, right sides together (so that the fabric now is 24" x 22"). Sew down each side with a 3/8" seam (or just less than 1/2").
Take one end of your bias tape and unfold it.
Fold the end in about a 1/4".
Refold the bias tape along the fold lines - see how the end is now enclosed?
Now take the bias tape and sandwich your side seam inside it - make sure the folded end is lined up with the fold of the fabric.
Pin in place.
Just about 3" from the top of the fabric, cut the bias tape. You do not need to fold this end because it will be enclosed in the top seam. Cutting here will reduce bulk when you sew the top seam later on.
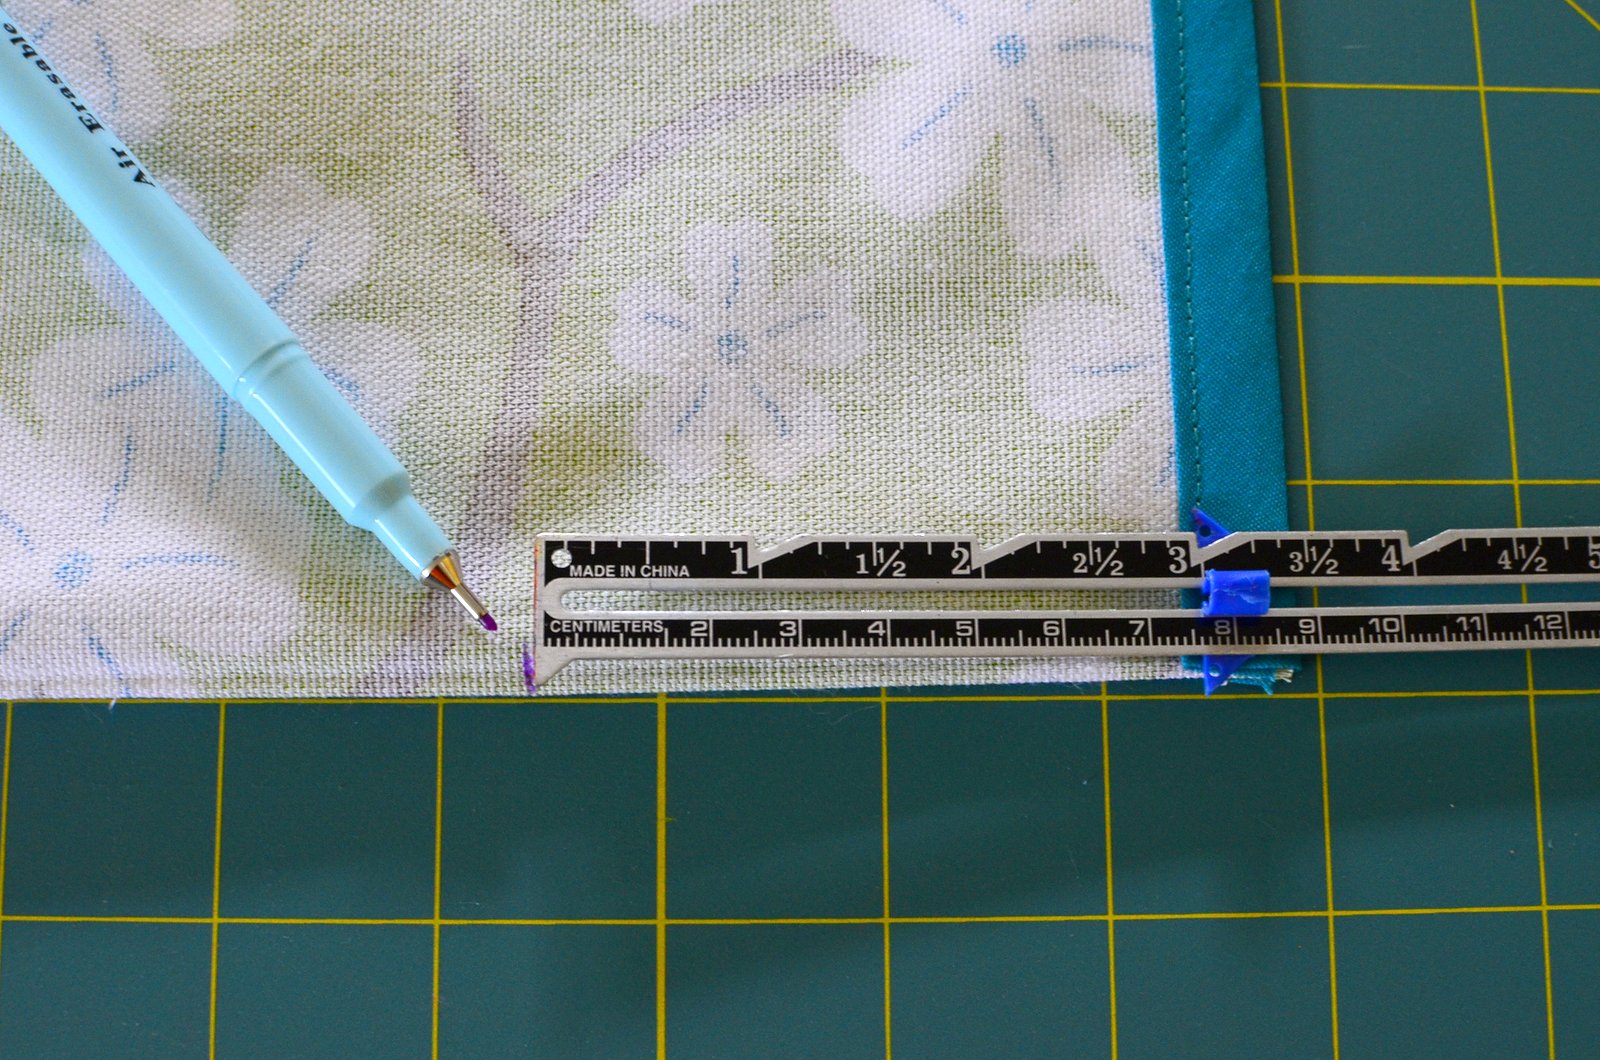
If you can, set your stitch width slightly smaller than regular (see what my machine looks like?). This will move the needle over to the left and help you sew right up against the bias edge.
Sew down the bias tape. You will be sewing through all layers - bias tape, bag, bias tape - in one seam here. (Look carefully and you'll see my needle - usually lined up with that little gap in the presser foot, but now moved to the left to get right up close to that bias edge.) Repeat for other side seam.
Now you are going to box the corner. This takes the flat tote body and turns it into a bag with a flat bottom. There are two ways to do this, and I actually usually prefer the other method if I am going to line a bag. Because this is a beginner project and we want the seams intact, we'll do it this way. Hard to photograph - easy to do!
Mark 3" from side seam...
...and 3" from the bottom fold.
You are going to pinch the corner so that those two marks match up. When you do, make sure the side seam lines up neatly with the bottom fold (do this by peeking inside the bag). Flatten out each side and pin in place.
Mark a line across the corner at the 3" mark, making sure the line is at a right angle to the seam.
Sew this line, making sure to backstitch/lockstitch at either end. Repeat for other corner.
Now for the top edge. Fold over 1 1/2" from the top, and press in place all the way around the top.
When you get to the side seams, make sure to lay them flat and then fold the top over - much less bulk this way.
Fold over the top 1 1/2" again and press. This enclosed the raw edge of the fabric top (and should cover the side bias tape edge, too).
Pin in place all the way around the top...
...and pin on each side of the side seams to hold in place.
Sew around the top with a 1/2" seam from the top of the bag (sorry for the blurry photo!). Then, sew another seam 1/2" from the bottom edge of the top (or 1" from the top).
Turn your bag right side out and it will look something like this!
Now for the handles. Find the center of the front and back of the bag (you can measure or simply fold in half, matching side seams). From that center mark, measure 5 3/4" to each side and mark. This will be where you insert your grommets.
Follow the directions on the grommet package to insert grommets at your 5 3/4" marks.
Insert one end of the rope and tie a sturdy knot. You may need to melt the ends if you rope is not 100% cotton - some polyester is more slippery than others! Insert the other end into the other grommet on the same side. I like my handles long for this type of bag, but try it on and see what length feels good to you at this point. Tie the second knot accordingly. Repeat for other side of bag, matching up handle length.
That's it!
Now, pack up that bag and head out on a last-hurrah-before-school-starts kind of adventure!